
9.5 Node Red Tutorial
Node Red Setup
-
In this tutorial, I am using a Linux terminal in Windows (WSL) for simplicity, if you're using other environment, that is fine too but some steps might be a little bit different, so be ready to adapt.
-
Install Node and NPM
sudo apt update
sudo apt install nodejs npm
- Install Node Red
sudo npm install -g --unsafe-perm node-red
- Run Node Red
node-red

- Access the Node Red server http://127.0.0.1:1880/ in the web browser

Node Red Debug
- Drag Inject Node in to the editor

- Double click the node and set the payload type to String

- Set the Payload and Topic to whatever you want, then click the "Done" button

- Drag the Debug Node in to the editor

- Connect both nodes

- Click the "Deploy" button in the top right corner


Node, ehem I mean Note: you can see the debug messages in the right section.
Node Red Dashboard
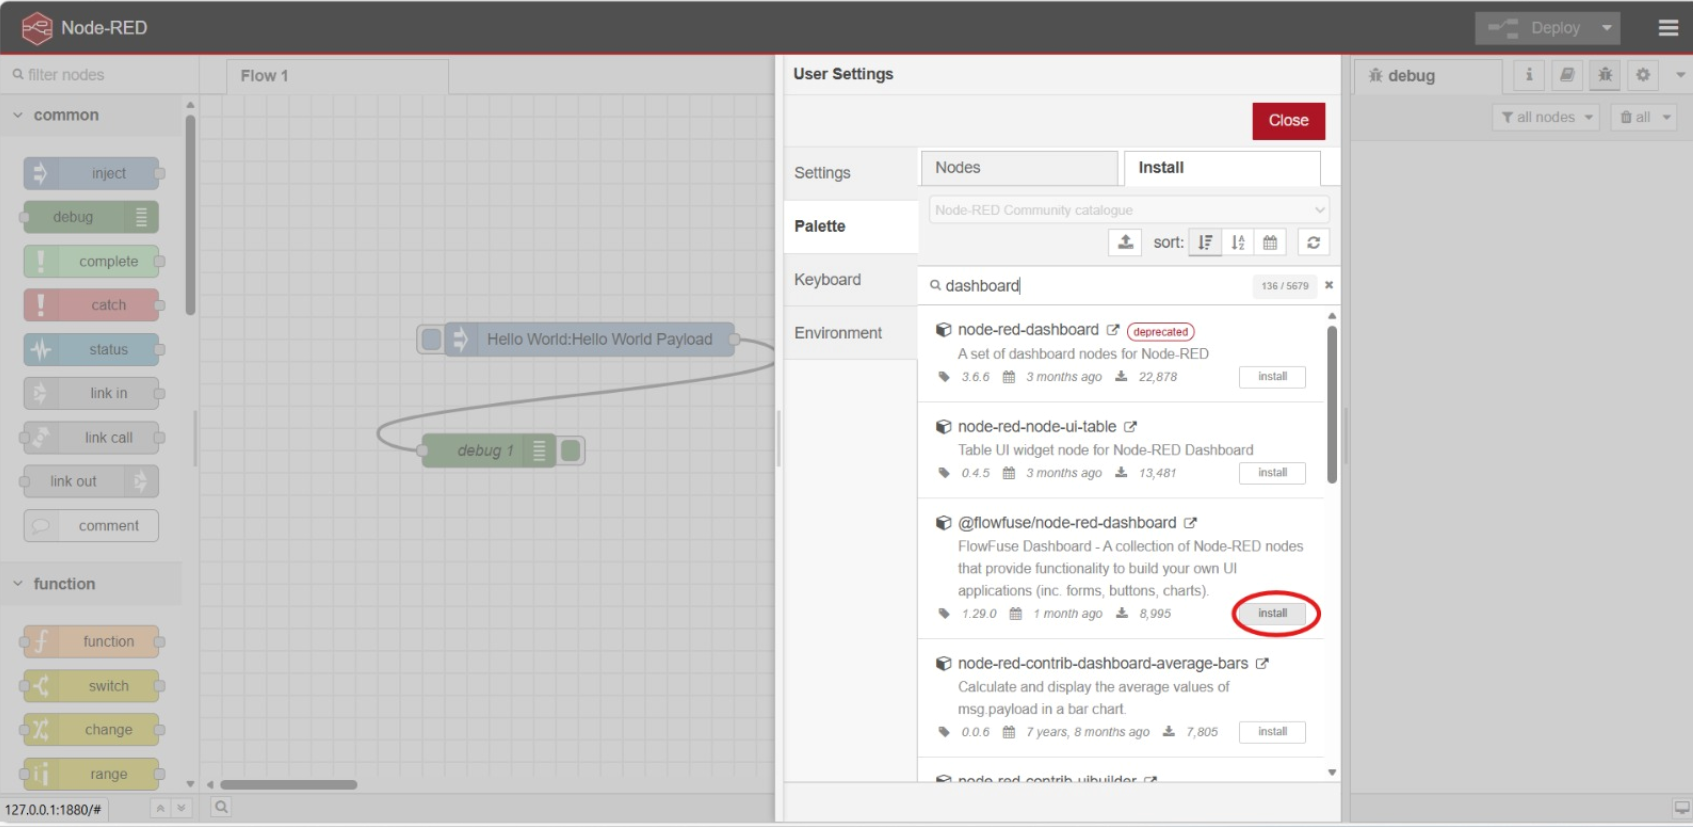
- Click the 3 stripes button in the top-right corner, then click "Manage Palette"

- Go to the "Install" section, search for
dashboardin the search bar, then install the dashboard palette from@flowfuse. Click the "Done" button once it is finished.
- You should now see the "Dashboard 2" node section if you scroll down enough. If you don't, then try to refresh the web or try to restart Node Red. Once you found it, drag the "button" node to the editor

- Double click the button node, then set the name to "LED", group to default (look at the screenshot below for reference), Label to "Toggle LED" and click the "Done" button once it is all finished

- Now scroll above in the node section till you found the
Functionnode section. Drag the "function" node to the editor and connect it with the "button" node that you've setup previously.

- Double click the "function" node and insert this code below, then click the "Done" button.
// Store LED state
context.ledState = context.ledState || false;

// Toggle LED state when button pressed
context.ledState = !context.ledState;

// Create message
msg.payload = {
    led_state: context.ledState,
    timestamp: new Date().toISOString(),
    message: context.ledState ? "LED ON" : "LED OFF"
};

return msg;

Note: The code here is to simulate an LED, since we haven't integrate to Wokwi yet in this Tutorial.
- Go back to the
Dashboard 2section and drag the "Text Output" node in to the editor and connect it with the "function" node

- Double click the "Text Output" node then apply these configurations. Set name to "LED Status", set the group to default (see the screenshot below for reference), set the label to "LED Status:", make sure the value type is
msgand its value is "payload.message", and set the Layout the same as seen in the screenshot below. Click the "Done" button once eveything is finished.

9, Drag the "debug" node to the editor and connect it to the "function" node

- Click the dropdown icon in the top-right corner, then click on "Dashboard 2.0"

- Click on the setting of your default group

- Set the size to
3 x 1. You can change the value later on to experiment on the dashboard layout, but for now we keep it on3 x 1for simplicity. Click the "Update" button, once it is finished.

- Click the "Deploy" button so that the changes are reflected

- To check on the dashboard, click the "open dashboard" button

- You should be directed to a page similar to this. Try clicking on the "Toggle LED" button and see what happens.

- You can also see the log history in the debug section since you use the "debug" node
