Code Example
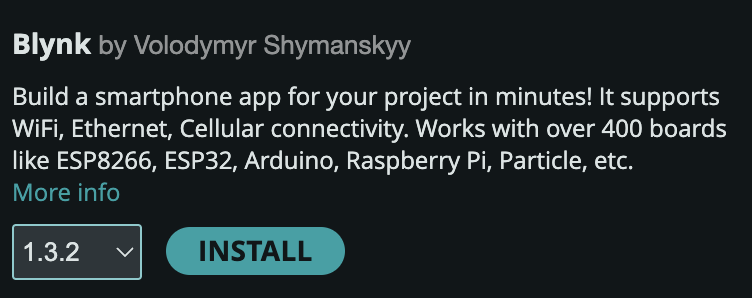
Before running this code, you need to install the Blynk library in the Arduino IDE.

In this example, we will use Blynk and ESP32 to monitor temperature and humidity in a room using the DHT11 sensor (if used, don’t forget to install the DHT library first). We will also display the sensor readings on the LCD widget and gauge widget in the Blynk app. Additionally, we will use the LED widget to indicate the connection status of the ESP32. The circuit diagram and code can be seen below:
// Include the Blynk and DHT libraries
#include <BlynkSimpleEsp32.h>
#include <DHT.h>
#include <WiFi.h>
#include <WiFiClient.h>

// Define Blynk authentication token
#define BLYNK_TEMPLATE_ID "YourTemplateID"
#define BLYNK_DEVICE_NAME "YourDeviceName"
#define BLYNK_AUTH_TOKEN "YourToken"

// Define WiFi credentials
char ssid[] = "YourNetworkName";
char pass[] = "YourPassword";

// Define DHT sensor type and pin
#define DHTTYPE DHT11
#define DHTPIN 4

// Create DHT object
DHT dht(DHTPIN, DHTTYPE);

// Define virtual pins for widgets
#define LED_VPIN V0
#define LCD_VPIN V1
#define GAUGE_VPIN V2

// Define LED pin
#define LED_PIN 25

// Define update interval in milliseconds
#define UPDATE_INTERVAL 2000

// Create a timer object
BlynkTimer timer;

// Define function to read and send sensor data
void sendSensorData() {
  // Read temperature and humidity from sensor
  float temperature = dht.readTemperature();
  float humidity = dht.readHumidity();

  // Check if readings are valid
  if (isnan(temperature) || isnan(humidity)) {
    // Display error message on LCD widget
    Blynk.virtualWrite(LCD_VPIN, "clear");
    Blynk.virtualWrite(LCD_VPIN, 0, 0, "DHT Sensor");
    Blynk.virtualWrite(LCD_VPIN, 0, 1, "error");
  } else {
    // Display readings on LCD widget
    Blynk.virtualWrite(LCD_VPIN, "clear");
    Blynk.virtualWrite(LCD_VPIN, 0, 0, "Temp: " + String(temperature) + " C");
    Blynk.virtualWrite(LCD_VPIN, 0, 1, "Humidity: " + String(humidity) + " %");
    // Display readings on gauge widget
    Blynk.virtualWrite(GAUGE_VPIN, temperature);
  }
}

// Define function to indicate connection status
void indicateConnection() {
  // Check if ESP32 is connected to Blynk
  if (Blynk.connected()) {
    // Turn on LED widget
    Blynk.virtualWrite(LED_VPIN, 255);
  } else {
    // Turn off LED widget
    Blynk.virtualWrite(LED_VPIN, 0);
  }
}

// Define function to handle button events
BLYNK_WRITE(25) {
  // Get the value from the button widget
  int value = param.asInt();
  // Write value to LED pin
  digitalWrite(LED_PIN, value);
}

void setup() {
  // Initialize serial communication
  Serial.begin(115200);

  // Initialize Blynk connection
  Blynk.begin(BLYNK_AUTH_TOKEN, ssid, pass);

  // Initialize DHT sensor
  dht.begin();

  // Initialize LED pin
  pinMode(LED_PIN, OUTPUT);

  // Set LED widget to off
  Blynk.virtualWrite(LED_VPIN, 0);

  // Clear LCD widget
  Blynk.virtualWrite(LCD_VPIN, "clear");

  // Set gauge widget to 0
  Blynk.virtualWrite(GAUGE_VPIN, 0);

  // Set timer to call sendSensorData function every UPDATE_INTERVAL milliseconds
  timer.setInterval(UPDATE_INTERVAL, sendSensorData);

  // Set timer to call indicateConnection function every 100 milliseconds
  timer.setInterval(100, indicateConnection);
}

void loop() {
  // Run Blynk process
  Blynk.run();
  // Run timer process
  timer.run();
}
Instructions for the Blynk app:
- Open the Blynk app and create a new project with the ESP32 device model and WiFi connection type. Copy the authentication token and paste it into the code.
- Add an LED widget and assign it to pin V0. Set the color to green.
- Add an LCD widget and assign it to pin V1. Set the advanced mode to ON and the text color to blue.
- Add a gauge widget and assign it to pin V2. Set the range to 0-50 and the text color to red.
- Select a button widget. Tap the button widget to open its settings. Set the name to "LED Control" and the color to green. Set the output to digital pin 25 and the mode to switch. This will link the button to the LED pin on the ESP32.
- Upload the code to the ESP32 and run the project. You should see temperature and humidity readings on the LCD and gauge widgets. You should also see the LED widget light up when the ESP32 is connected to Blynk.
