PlatformIO (Recommended)
About
PlatformIO is a versatile, open-source ecosystem designed for embedded development, providing a unified platform for building, managing, and debugging firmware across a wide range of microcontroller architectures. Integrated with popular IDEs like VSCode and Atom, it offers powerful tools for code editing, dependency management, and cross-compilation. PlatformIO simplifies the development process with its rich library ecosystem, support for multiple frameworks, and seamless integration with version control systems, making it an invaluable tool for both hobbyists and professionals in the embedded systems community.
Install PlatformIO
1. Install VScode
If you haven't already, install VSCode on your machine. Download Here
2. Install PlatformIO Extension
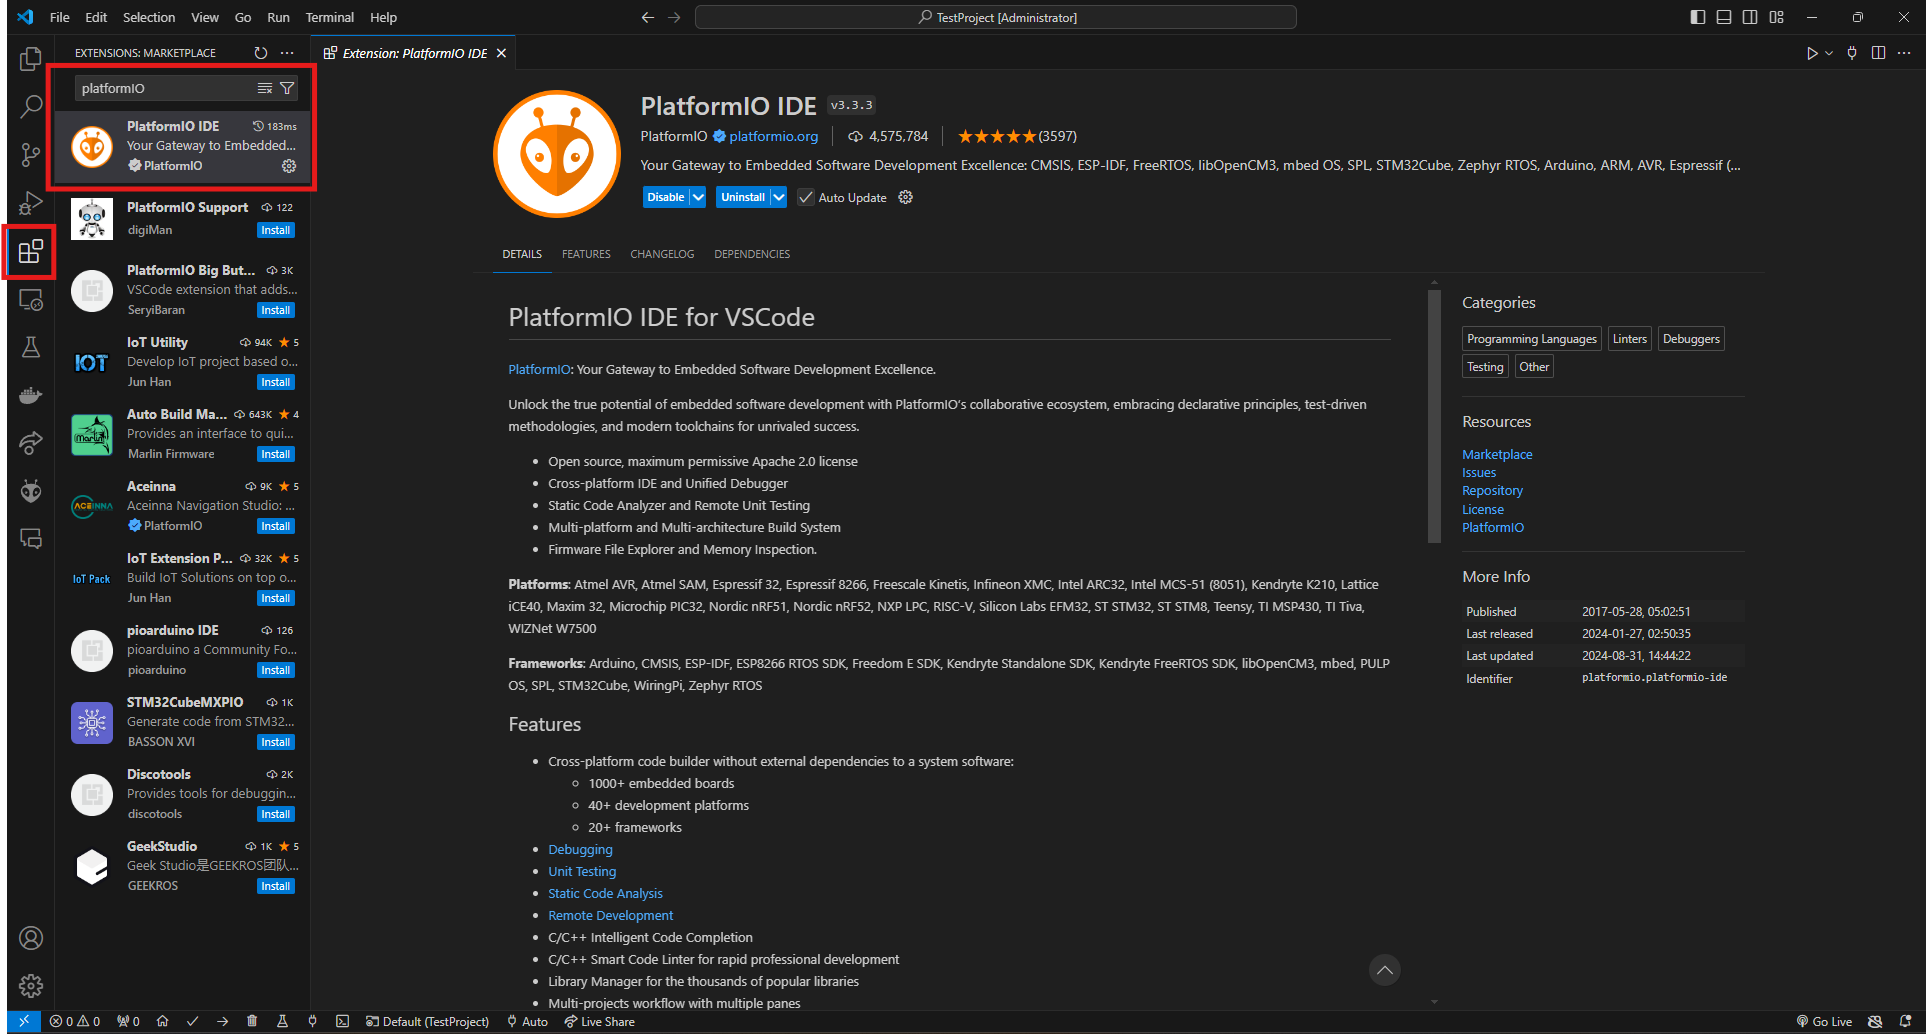
After you've finished installing and setting up VSCode, open the Extensions menu, search for PlatformIO, and then install it.
Creating A New Project
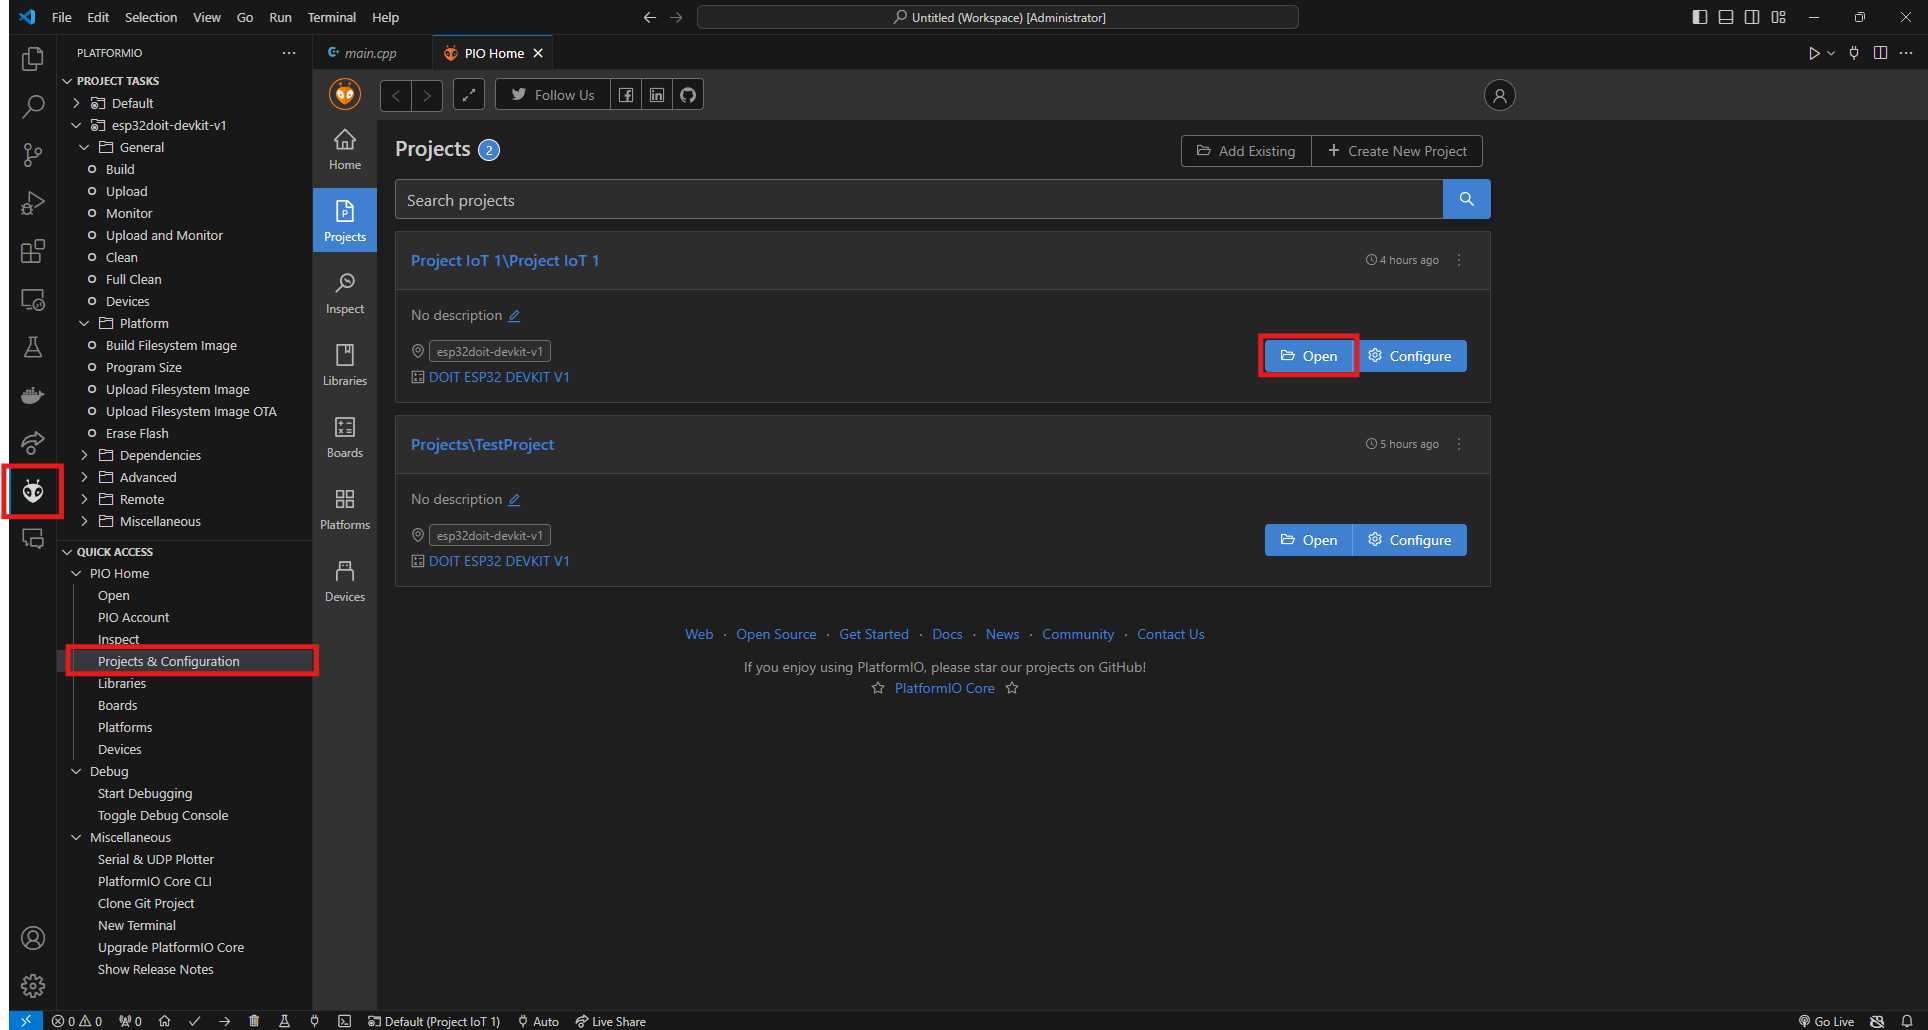
1. Open the Projects & Configurations Tab
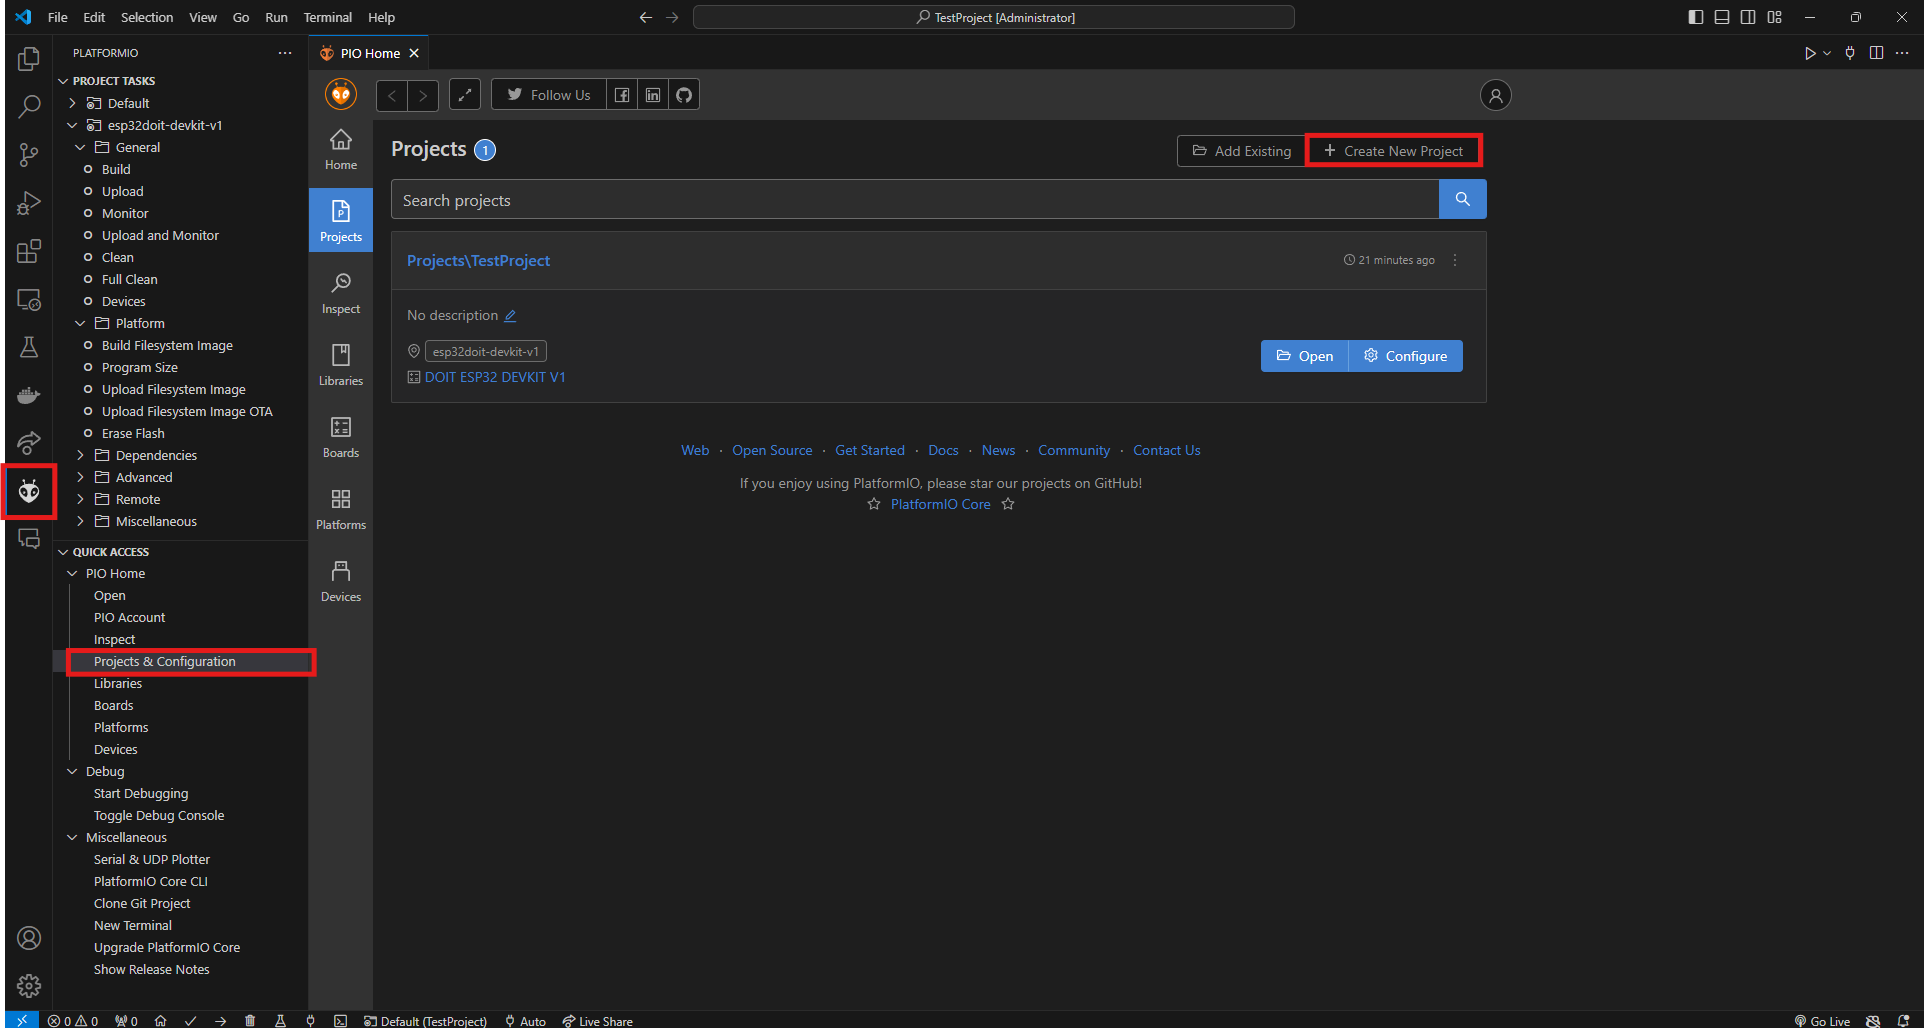
Open the PlatformIO menu. Then, within the Quick Access tab, select the Projects & Configurations tab.
2. Click Create New Project and Follow the Project Wizard
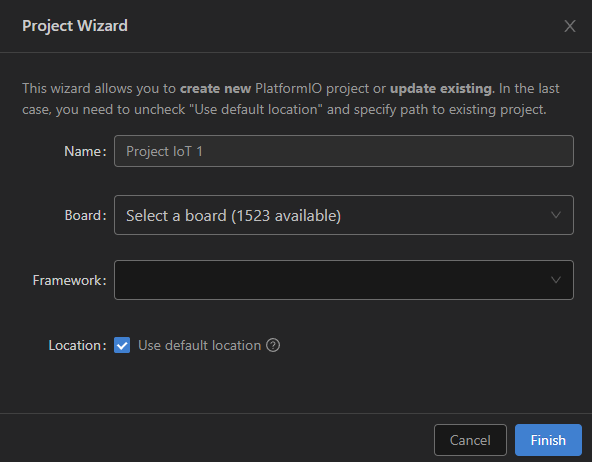
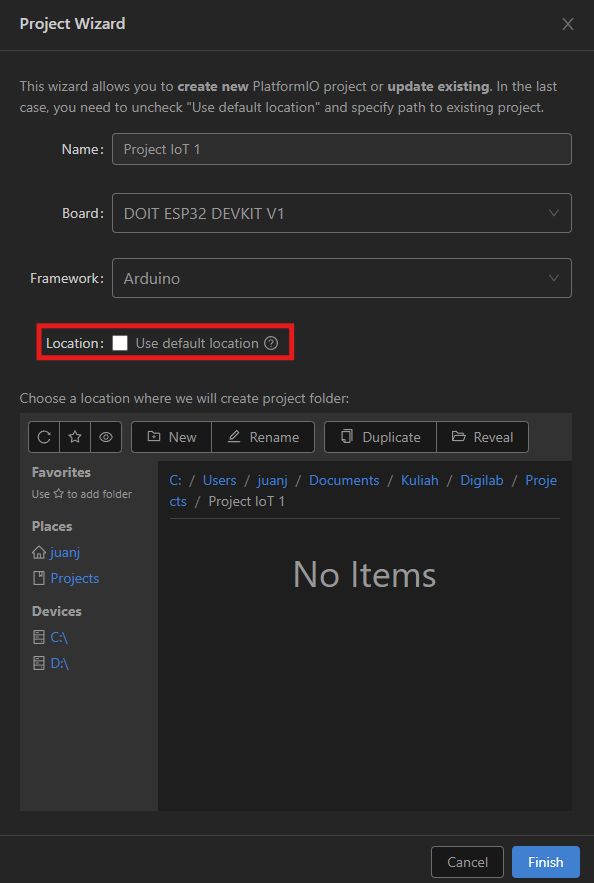
Click the Create New Project button, then fill out the required fields for the project.
First, set the name of the project.
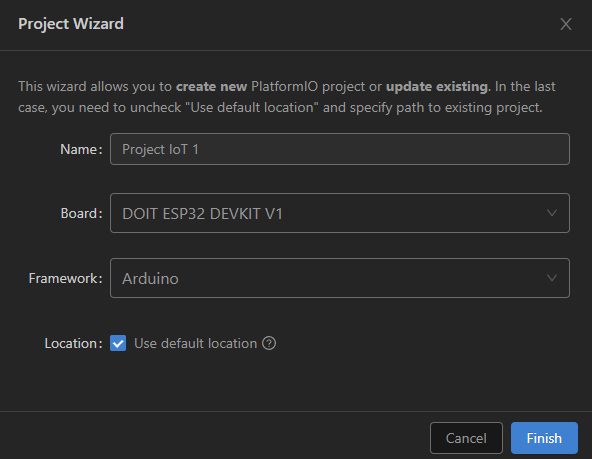
Second, choose the board you want to use. In this example it will be DOIT ESP32 DEVKIT V1
Third, choose which framework you want to develop in. In this example, it will be the default choice, which is the Arduino framework.
(Optional) Uncheck the Use default location checkbox and choose the project location.
Lastly, click Finish
3. Open the Created Project
The project should be opened automatically, but if not, open it in the Projects & Configurations tab, similar to step 1.
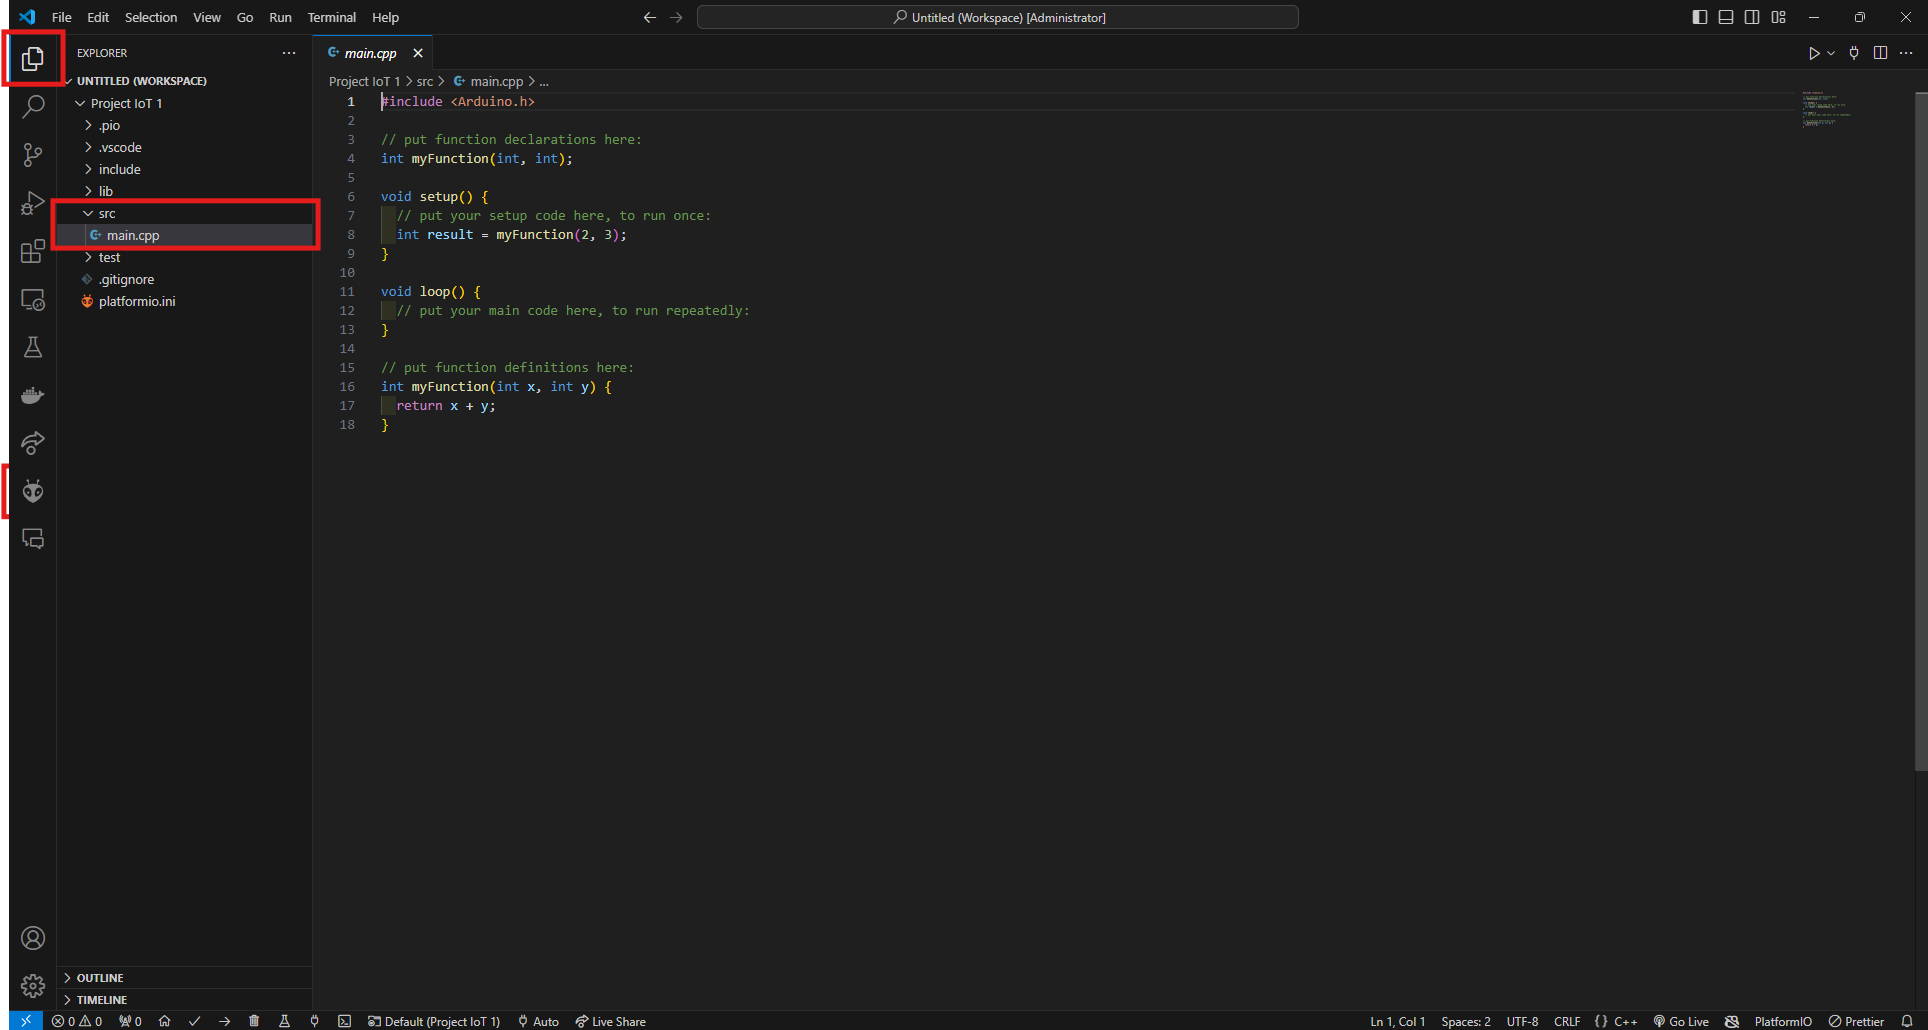
Once the project is opened. Navigate to src/main.cpp file via the Explorer tab.
And done. This main.cpp file will be where you'll be coding your project, similar to a .ino file in the Arduino IDE.
Choosing Ports
By default, PlatformIO automatically chooses the correct port to upload your code to your board. Most of the time, it works. But if it doesn't work or maybe you have 2 or more boards connected, here's how you can choose the port of your active board.
1. Click the Port Button
Click the Set upload/monitor/test port button at the bottom.
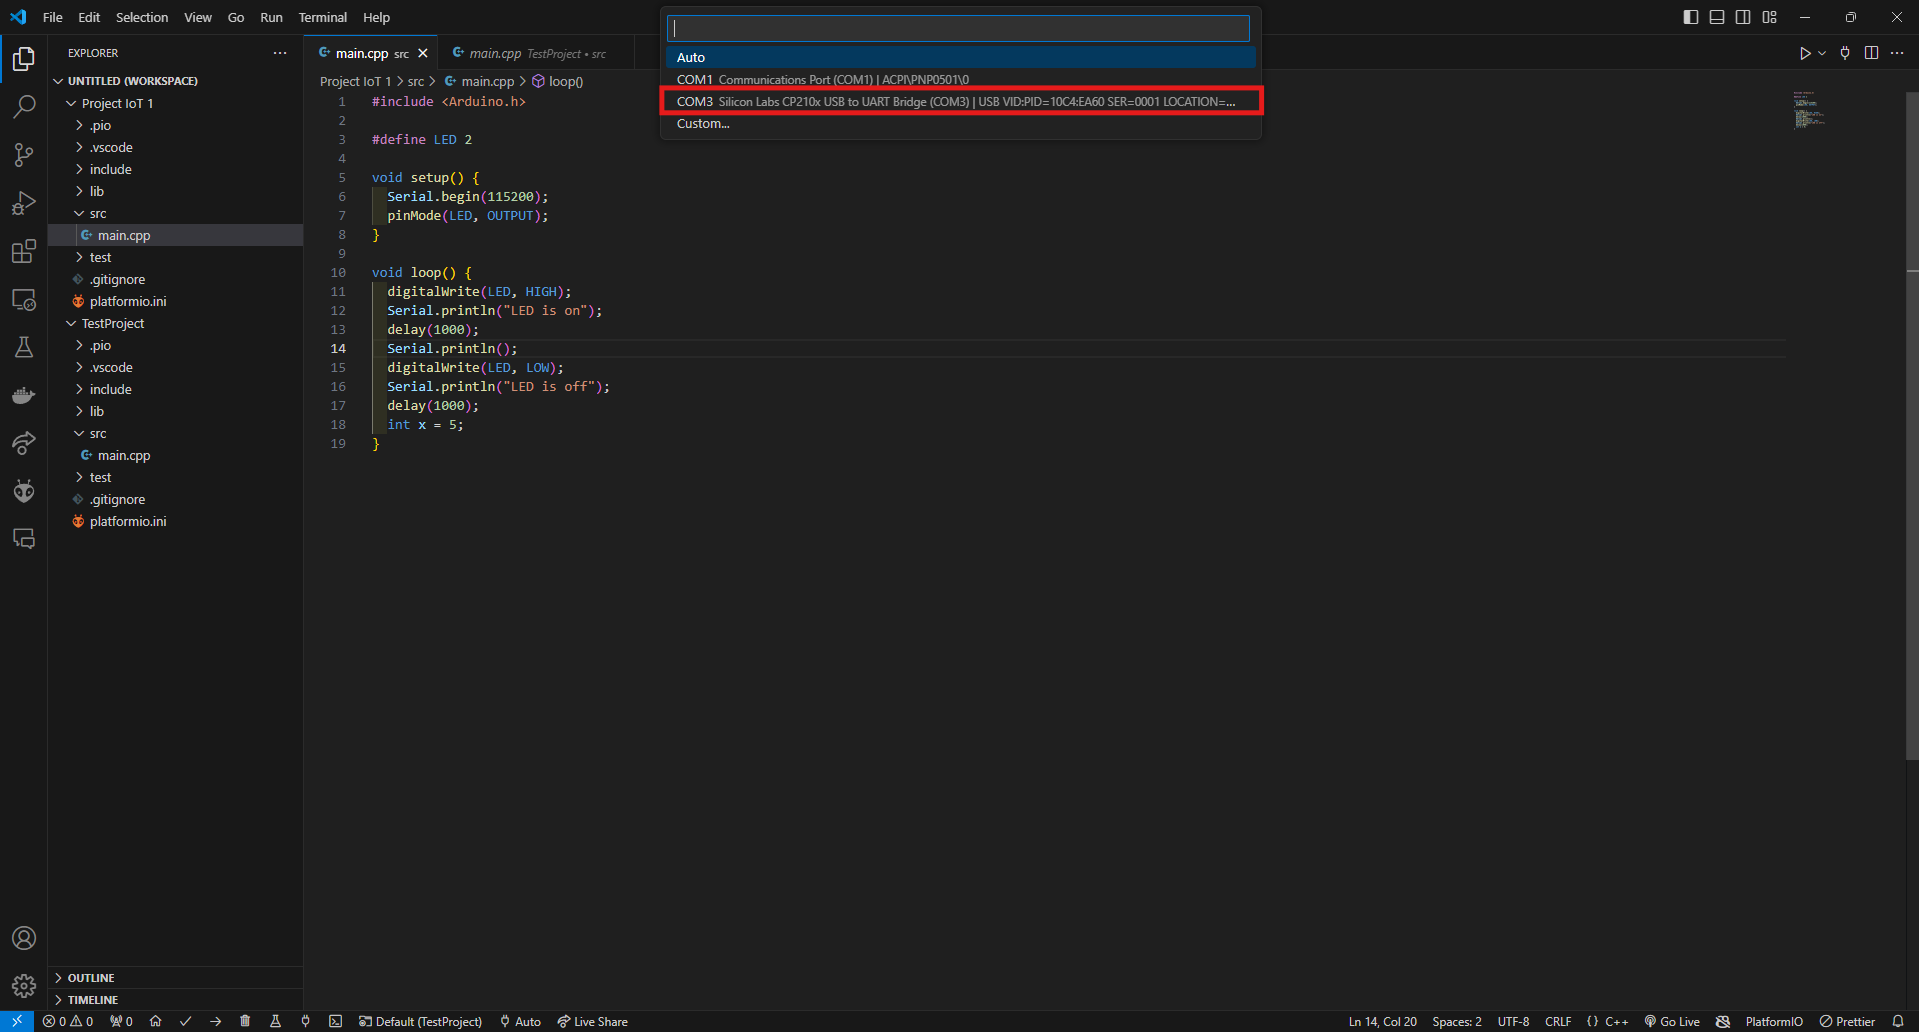
2. Select an Active Port
Choose the port connected to your machine. Its most likely described as either CP210x or CH340.
Choosing a Project Environtment
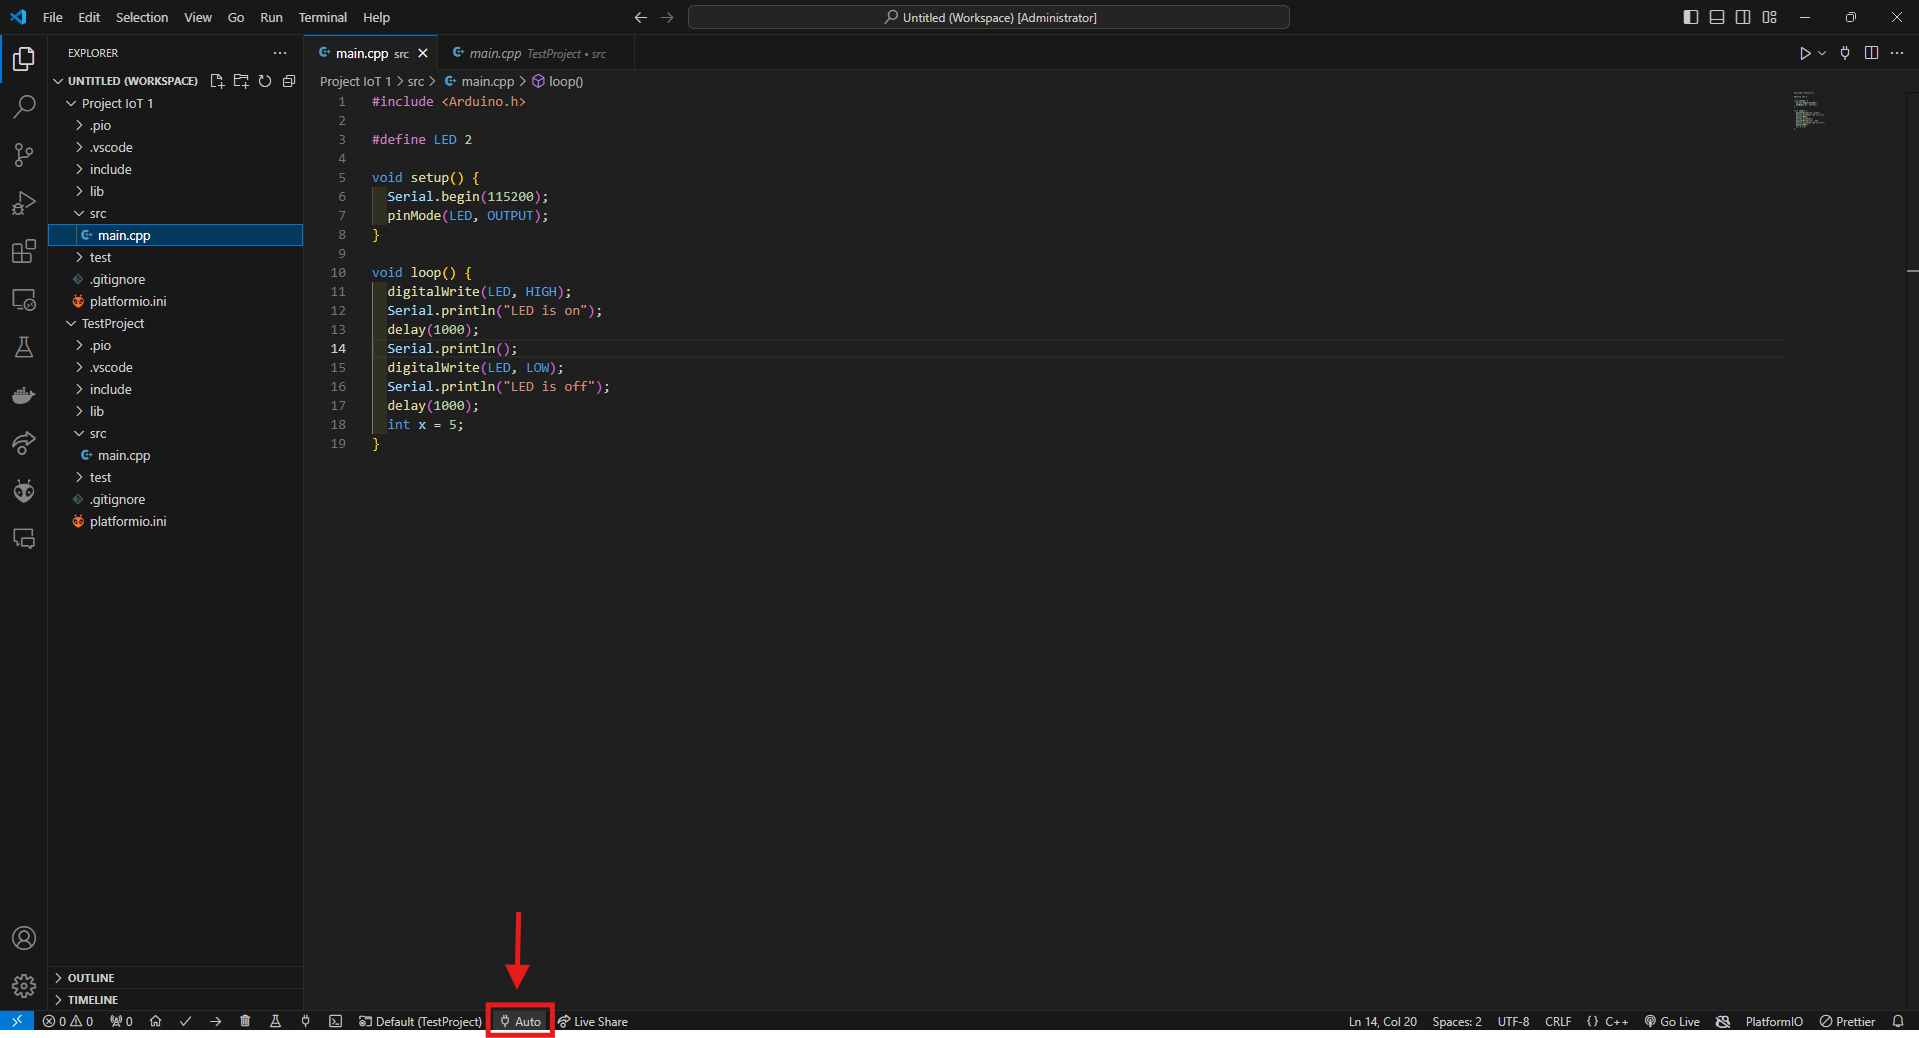
If you have more that 1 project, you need to choose a default project so that PlatformIO knows which project are you currently working on.
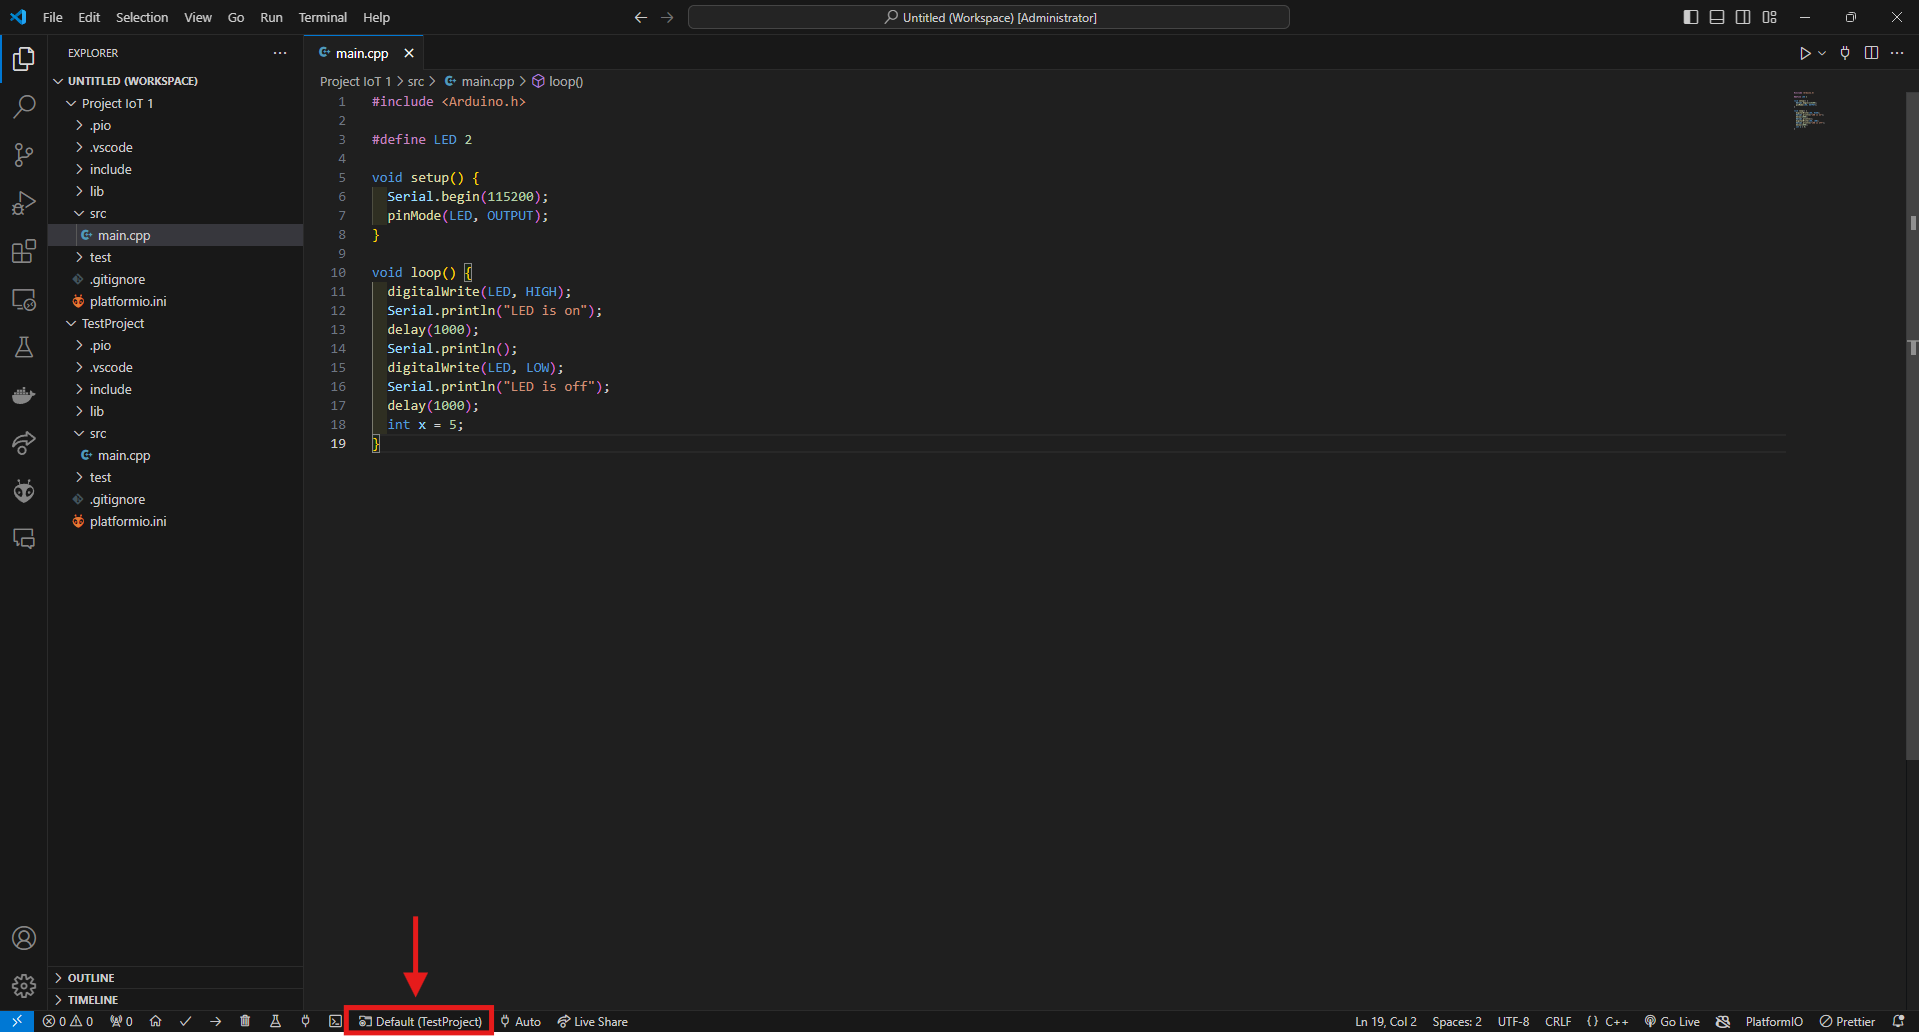
1. Choose the Project Button
Click the Switch PlatformIO Project Environtment button at the bottom.
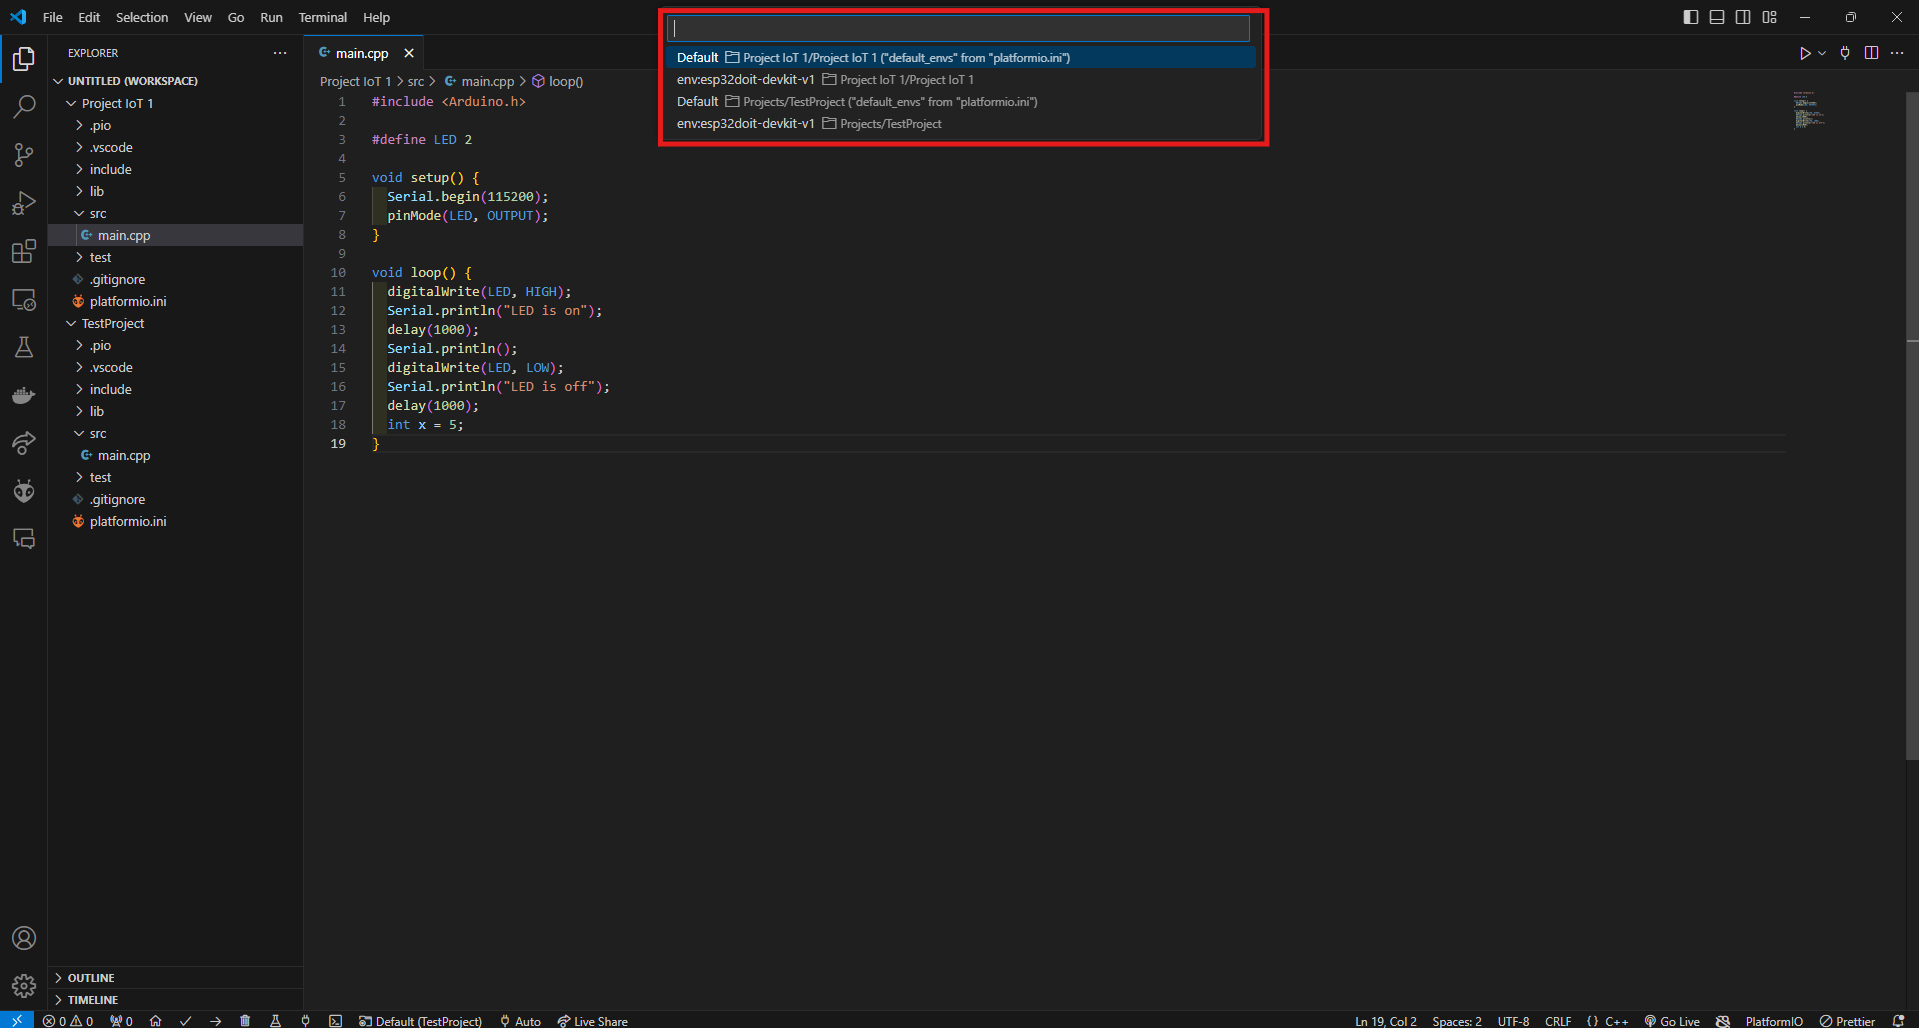
2. Choose a Project
Choose the project you want to work on. Utilize the search feature to ease your searching.
Uploading Code
Make sure that your port and project environtment is configured properly. Follow the steps above if you haven't done this already.
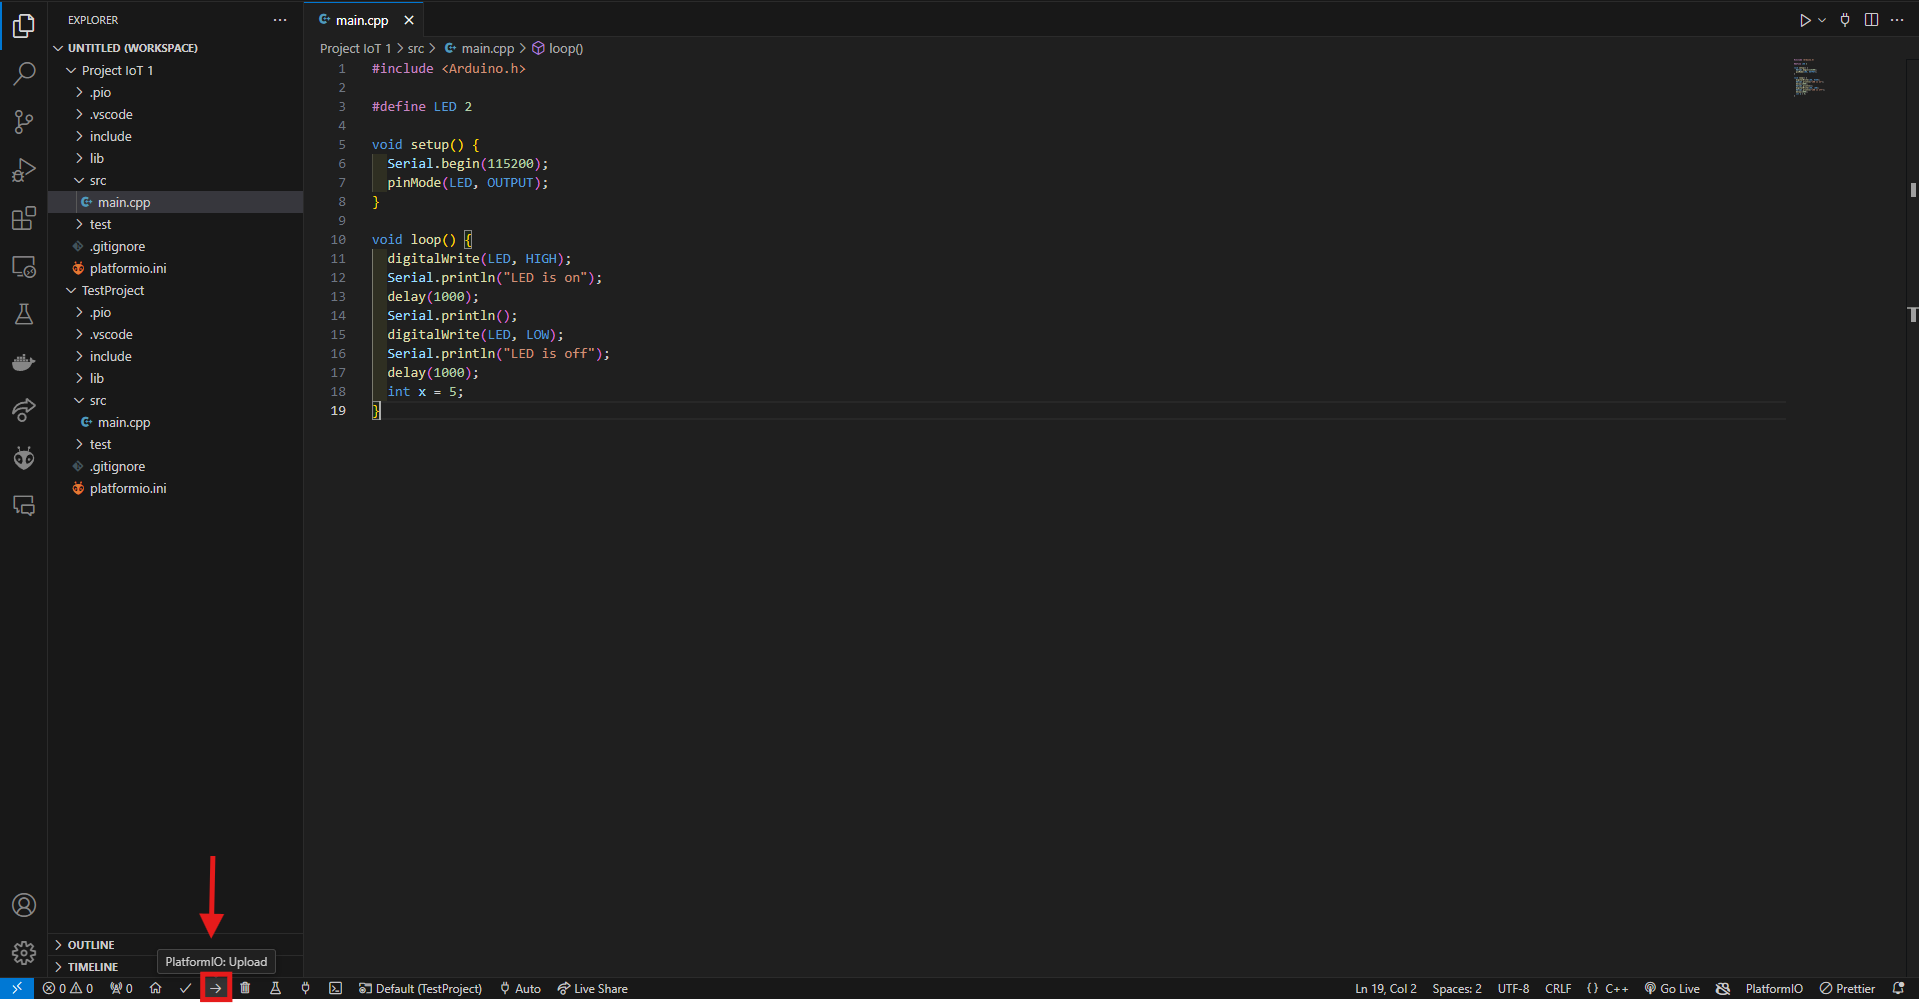
1. Click the Upload Button
Click the Upload Button
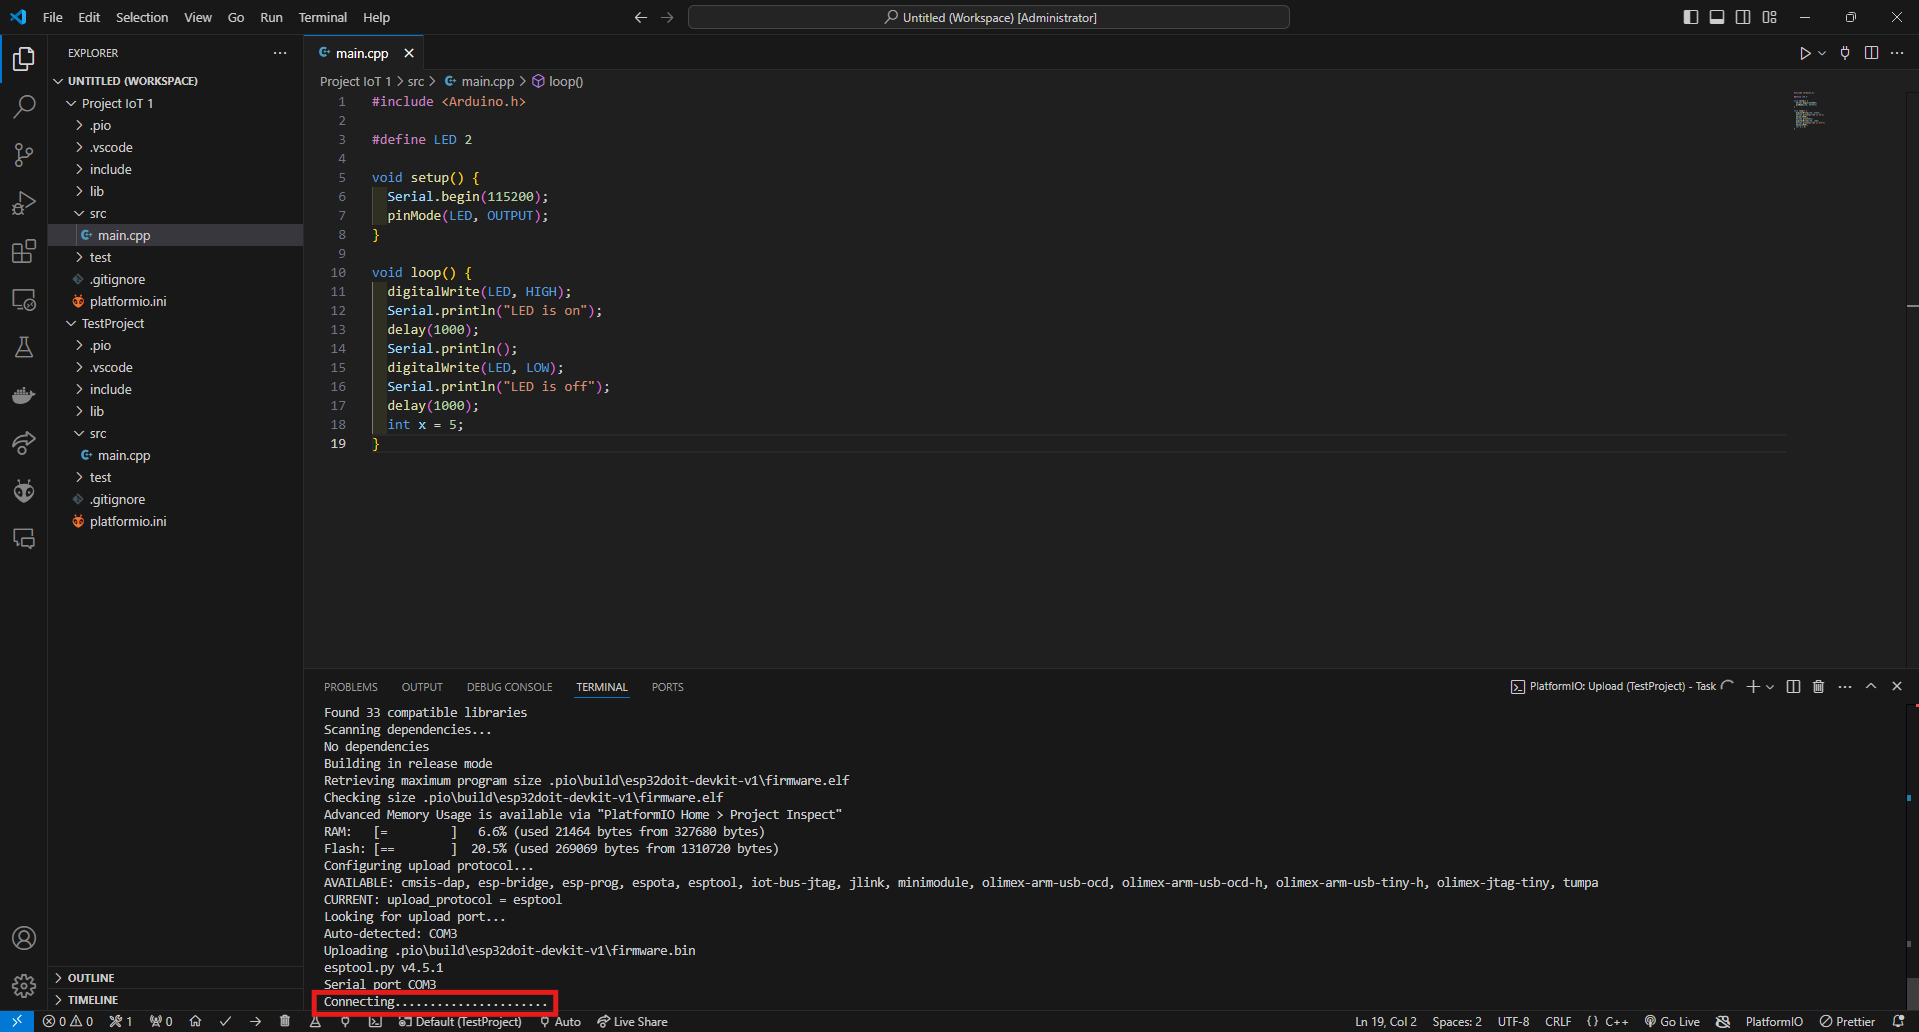
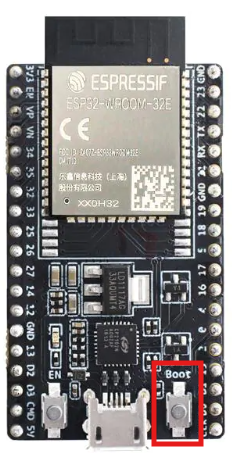
2. Hold the Boot Button on ESP32 if using an ESP32
Wait for your code to be compiled first. Then, when the connecting........ appears, hold the boot button on the ESP32 until the uploading process is complete.
Serial Monitor
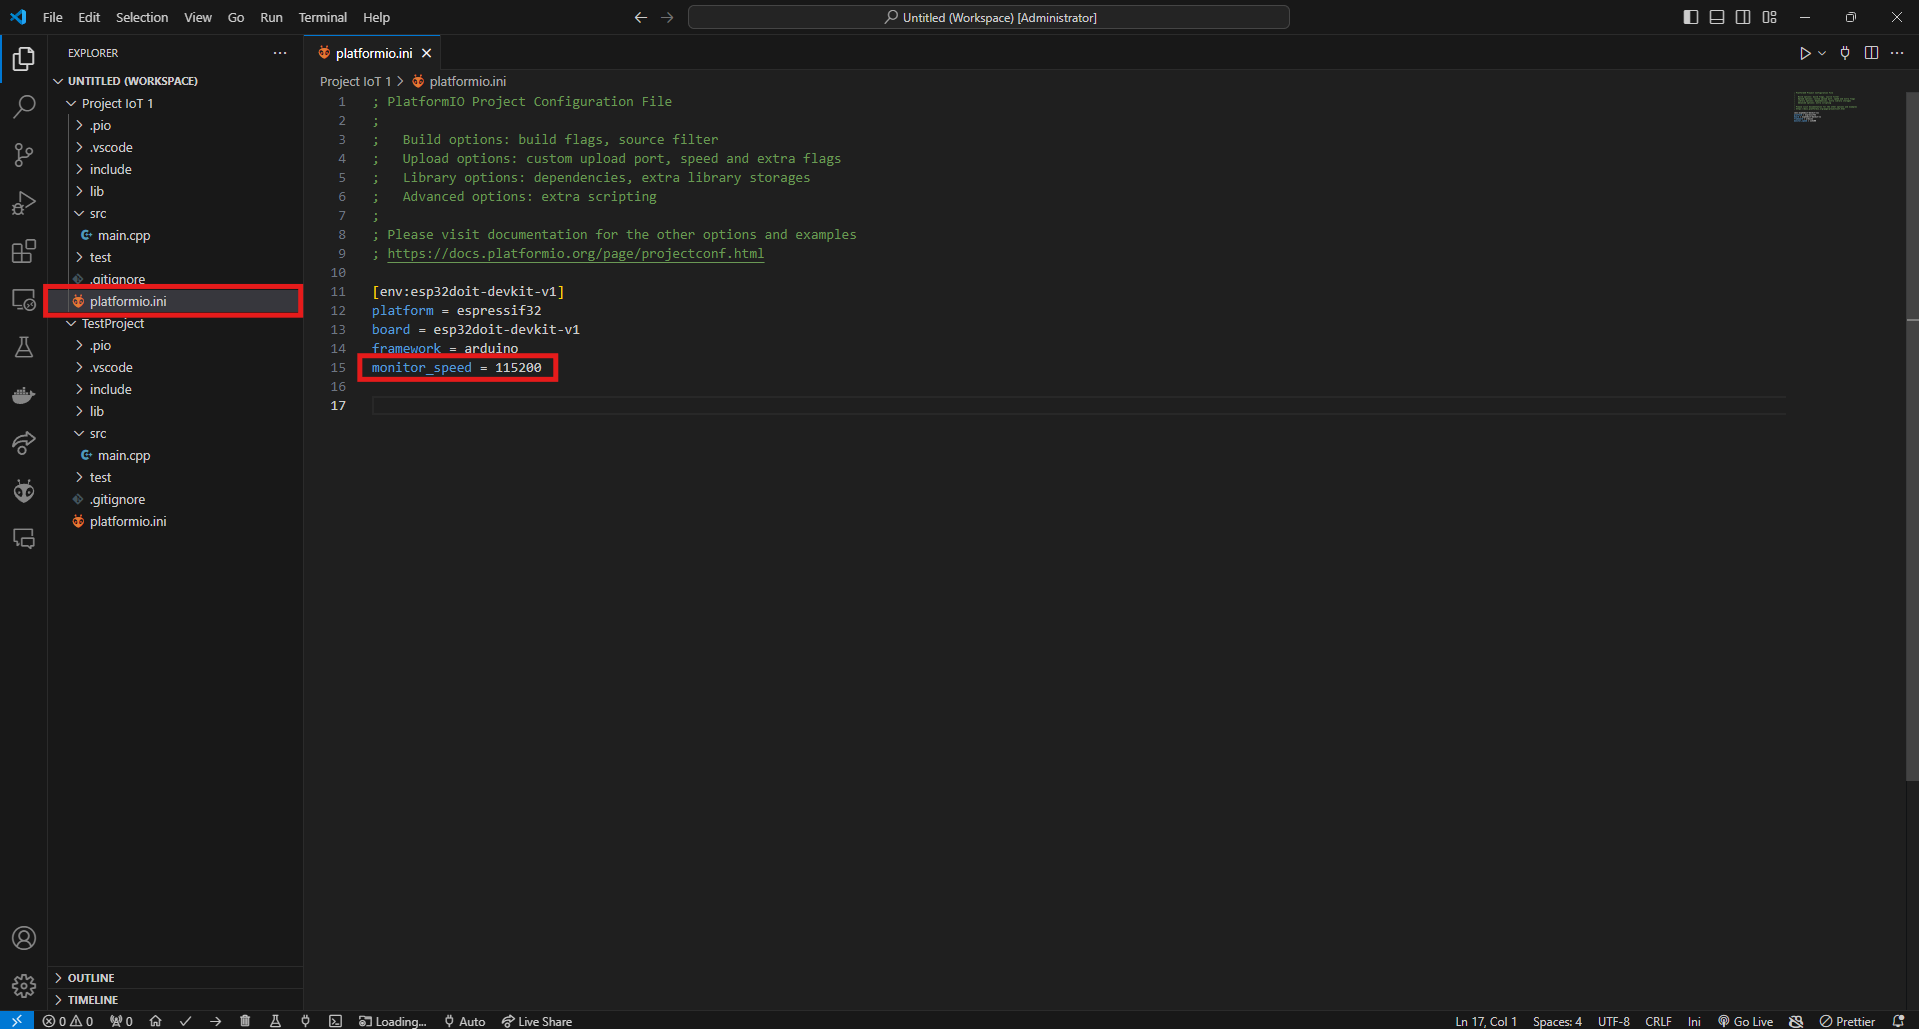
1. Configure the Serial Baud Rate
monitor_speed = [Your baud rate]
Example :
monitor_speed = 115200
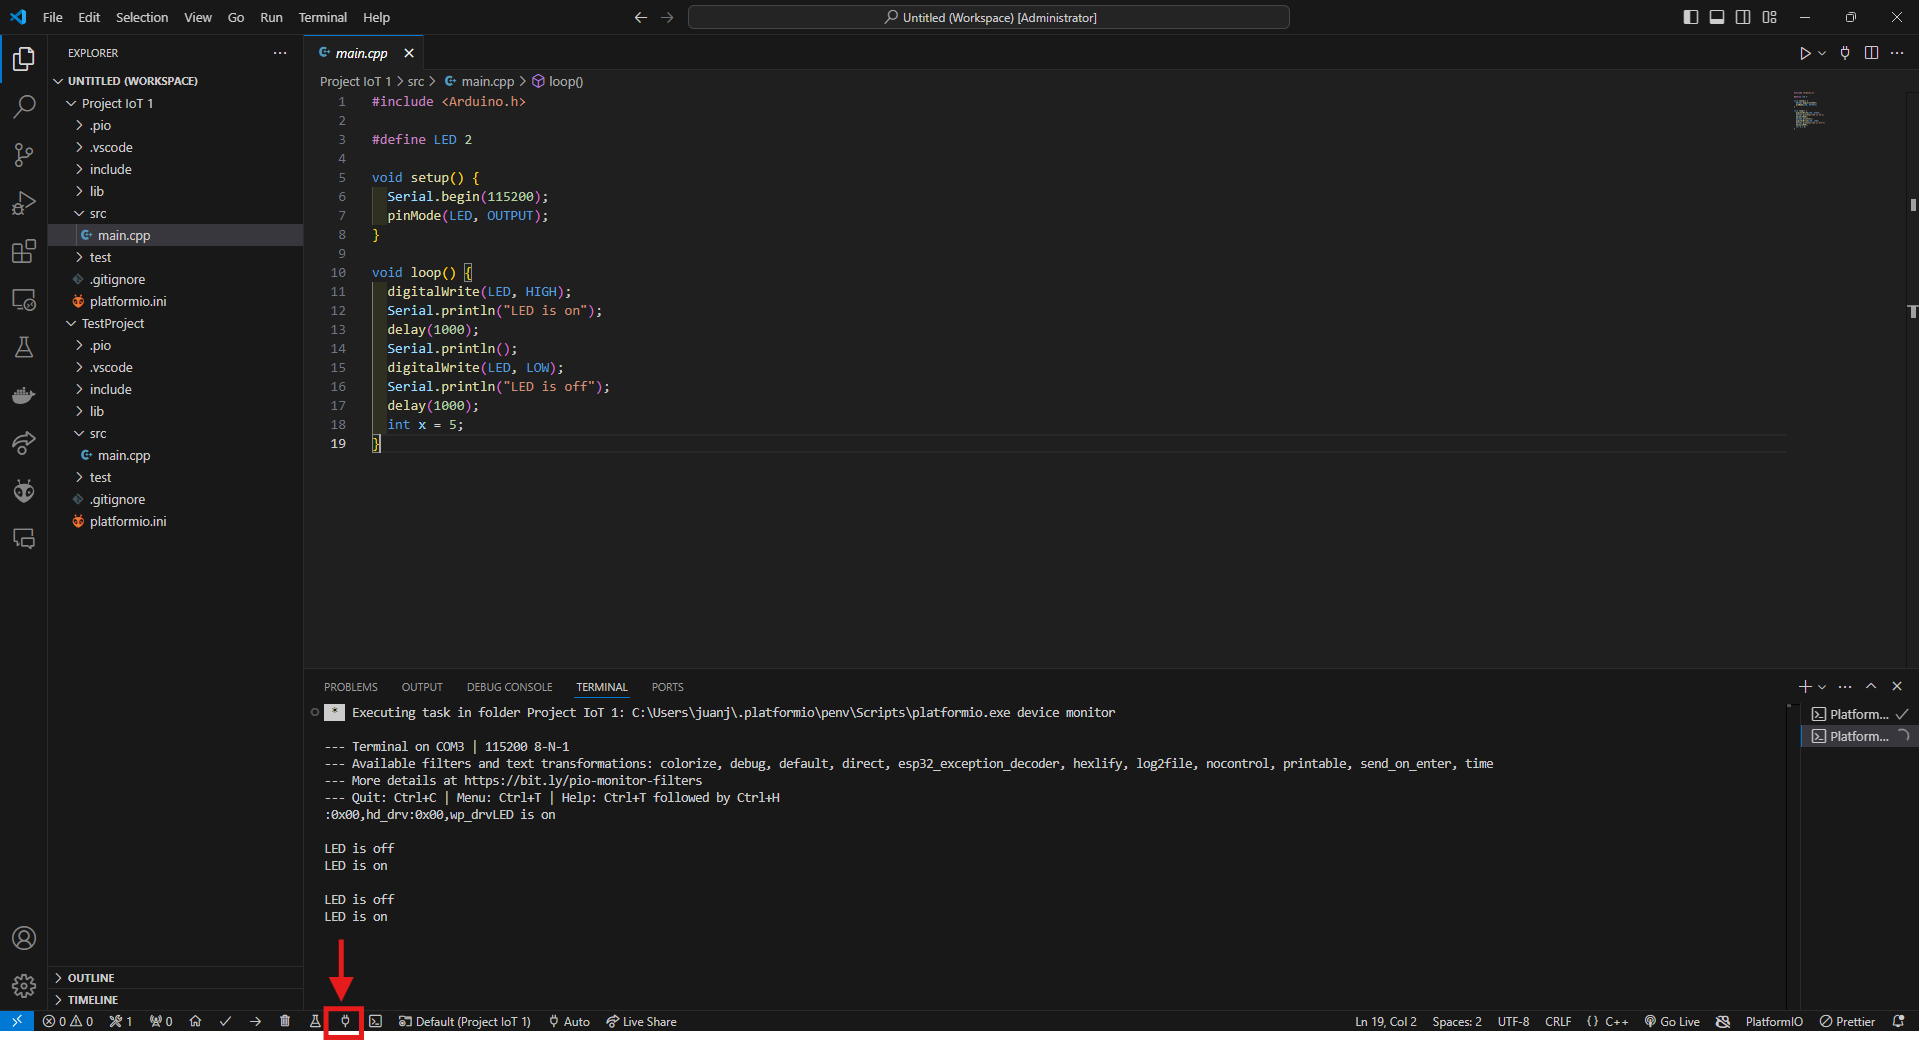
2. Click the Serial Monitor Button
Wait for the project to update, then click the Serial Monitor button.
Installing Libraries
You can install any library from PlatformIO.
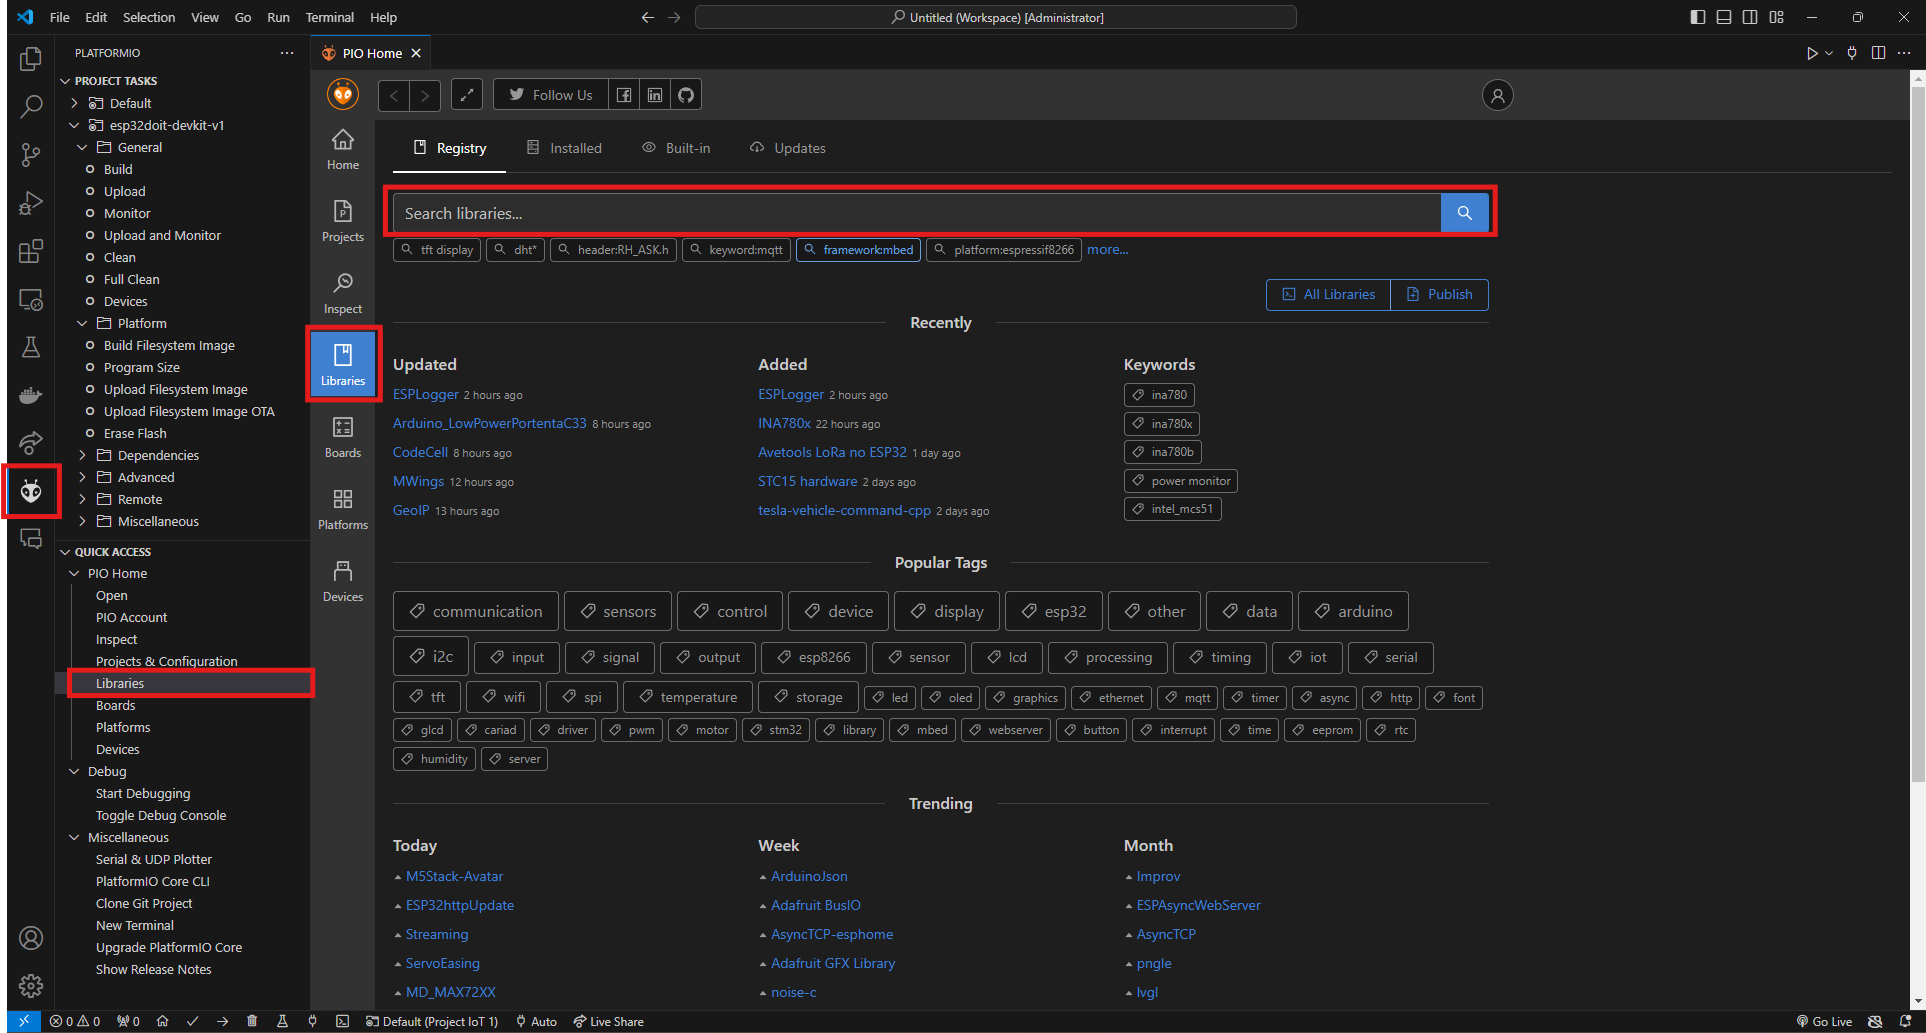
1. Open the Libraries Page
Click the PlatformIO button, then open the Libraries Page
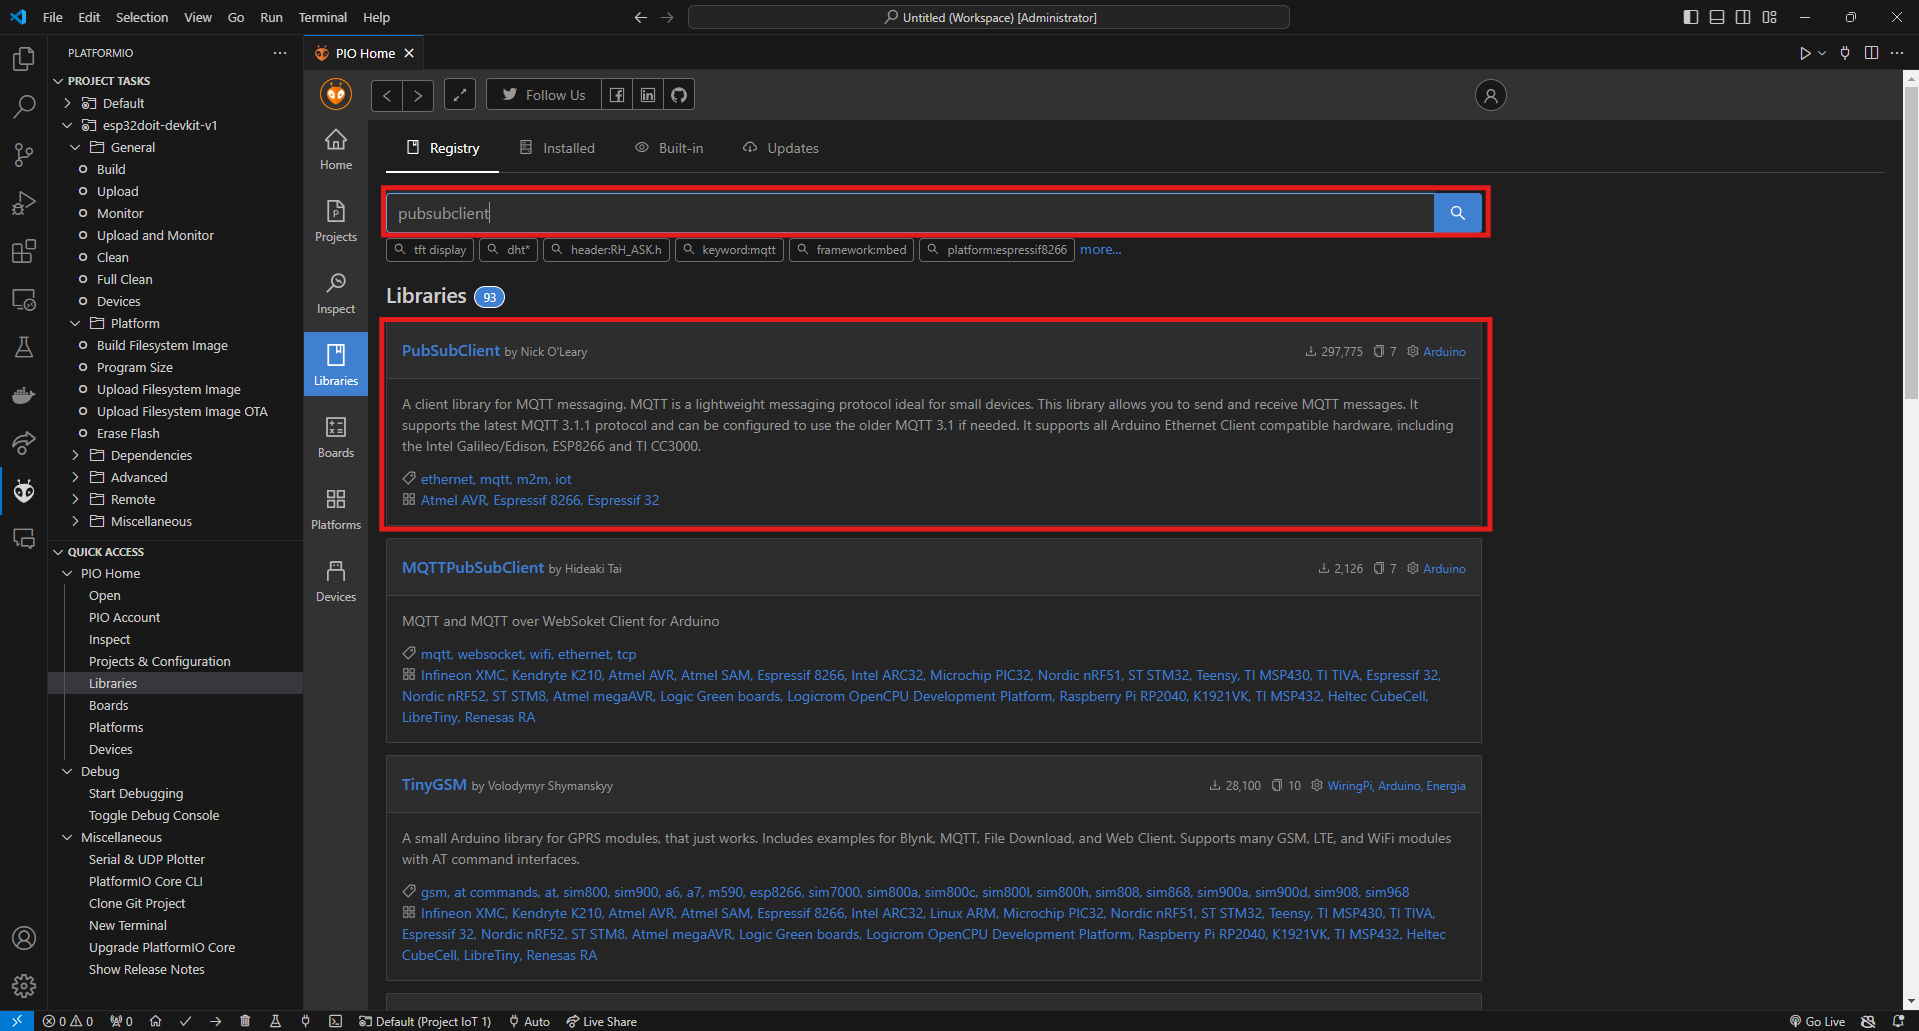
2. Search for a Library
Search for the Library you need
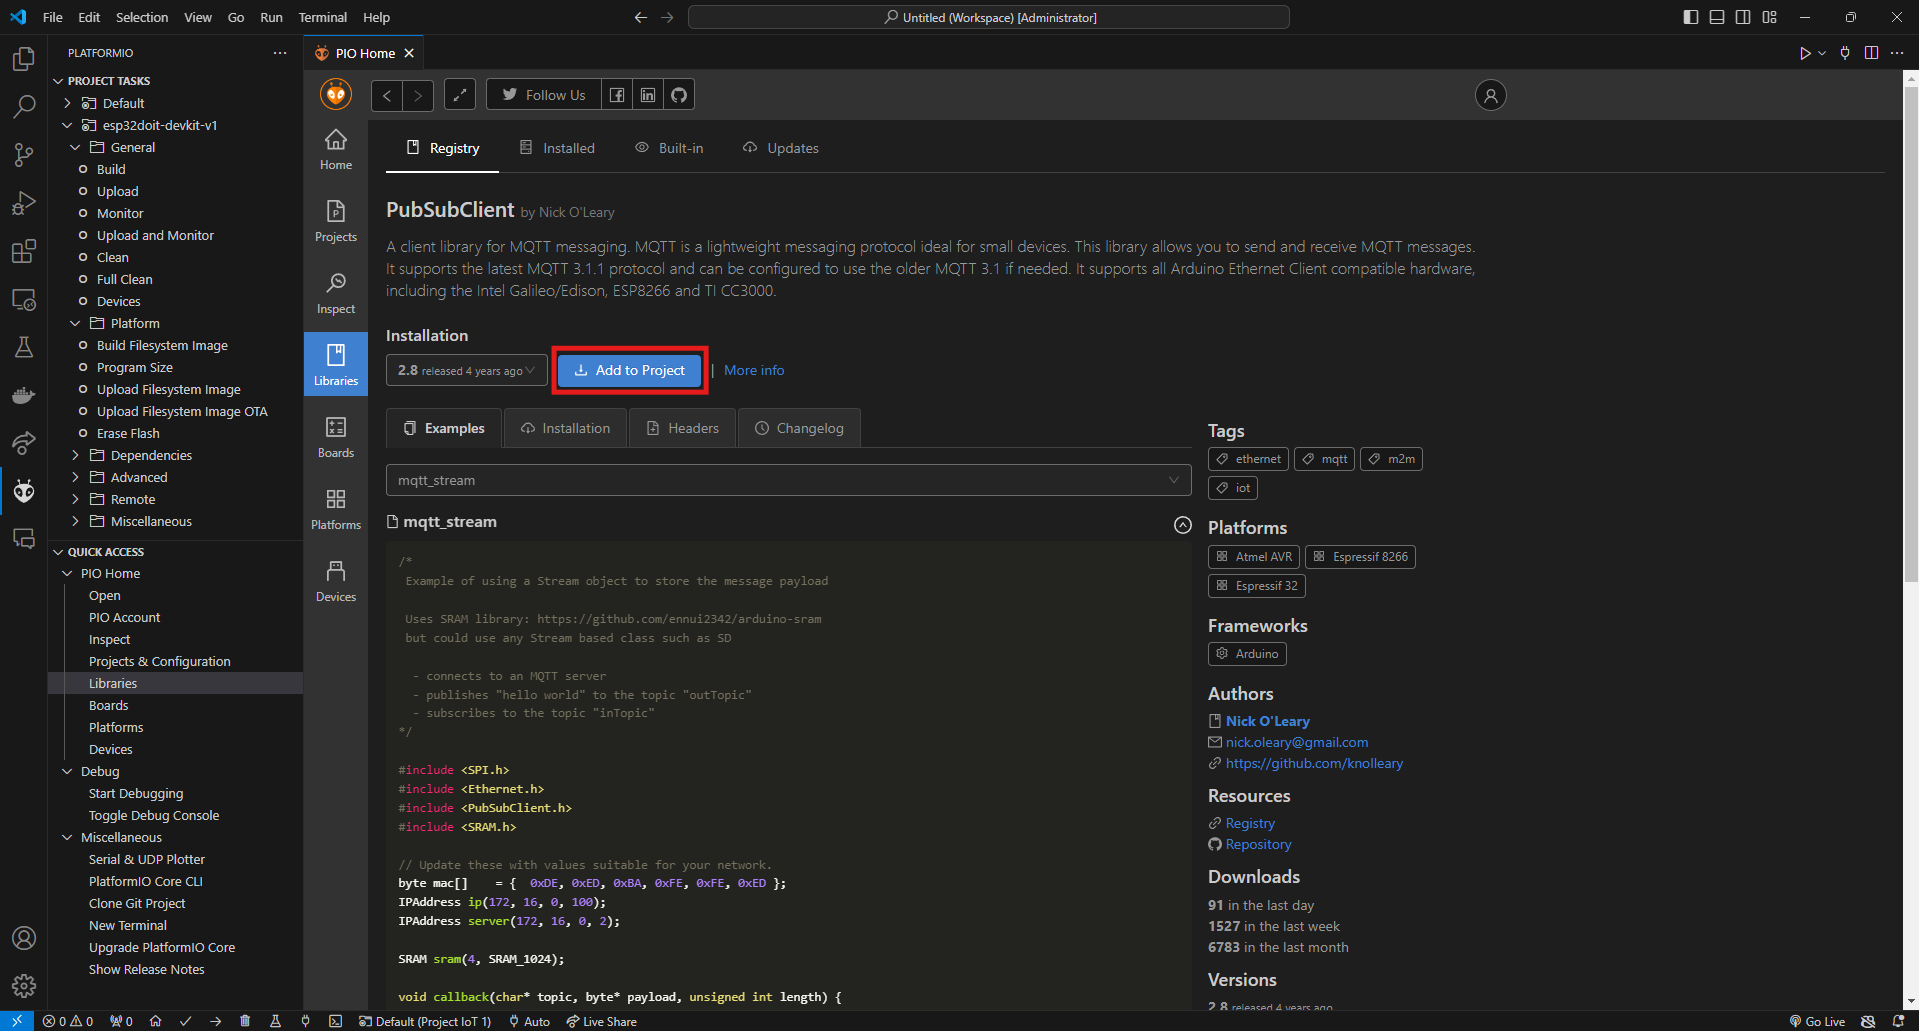
3. Add to Project
Click the Add to Project button. From this page, you can also view code examples, link to github repo, etc.
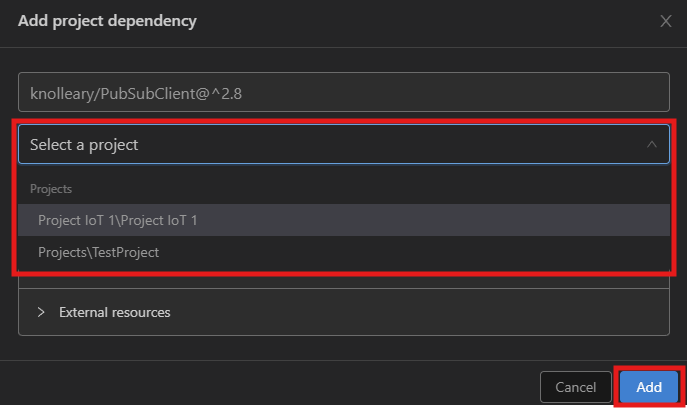
4. Choose Project
Choose the project you want to add the library. Then, click Add
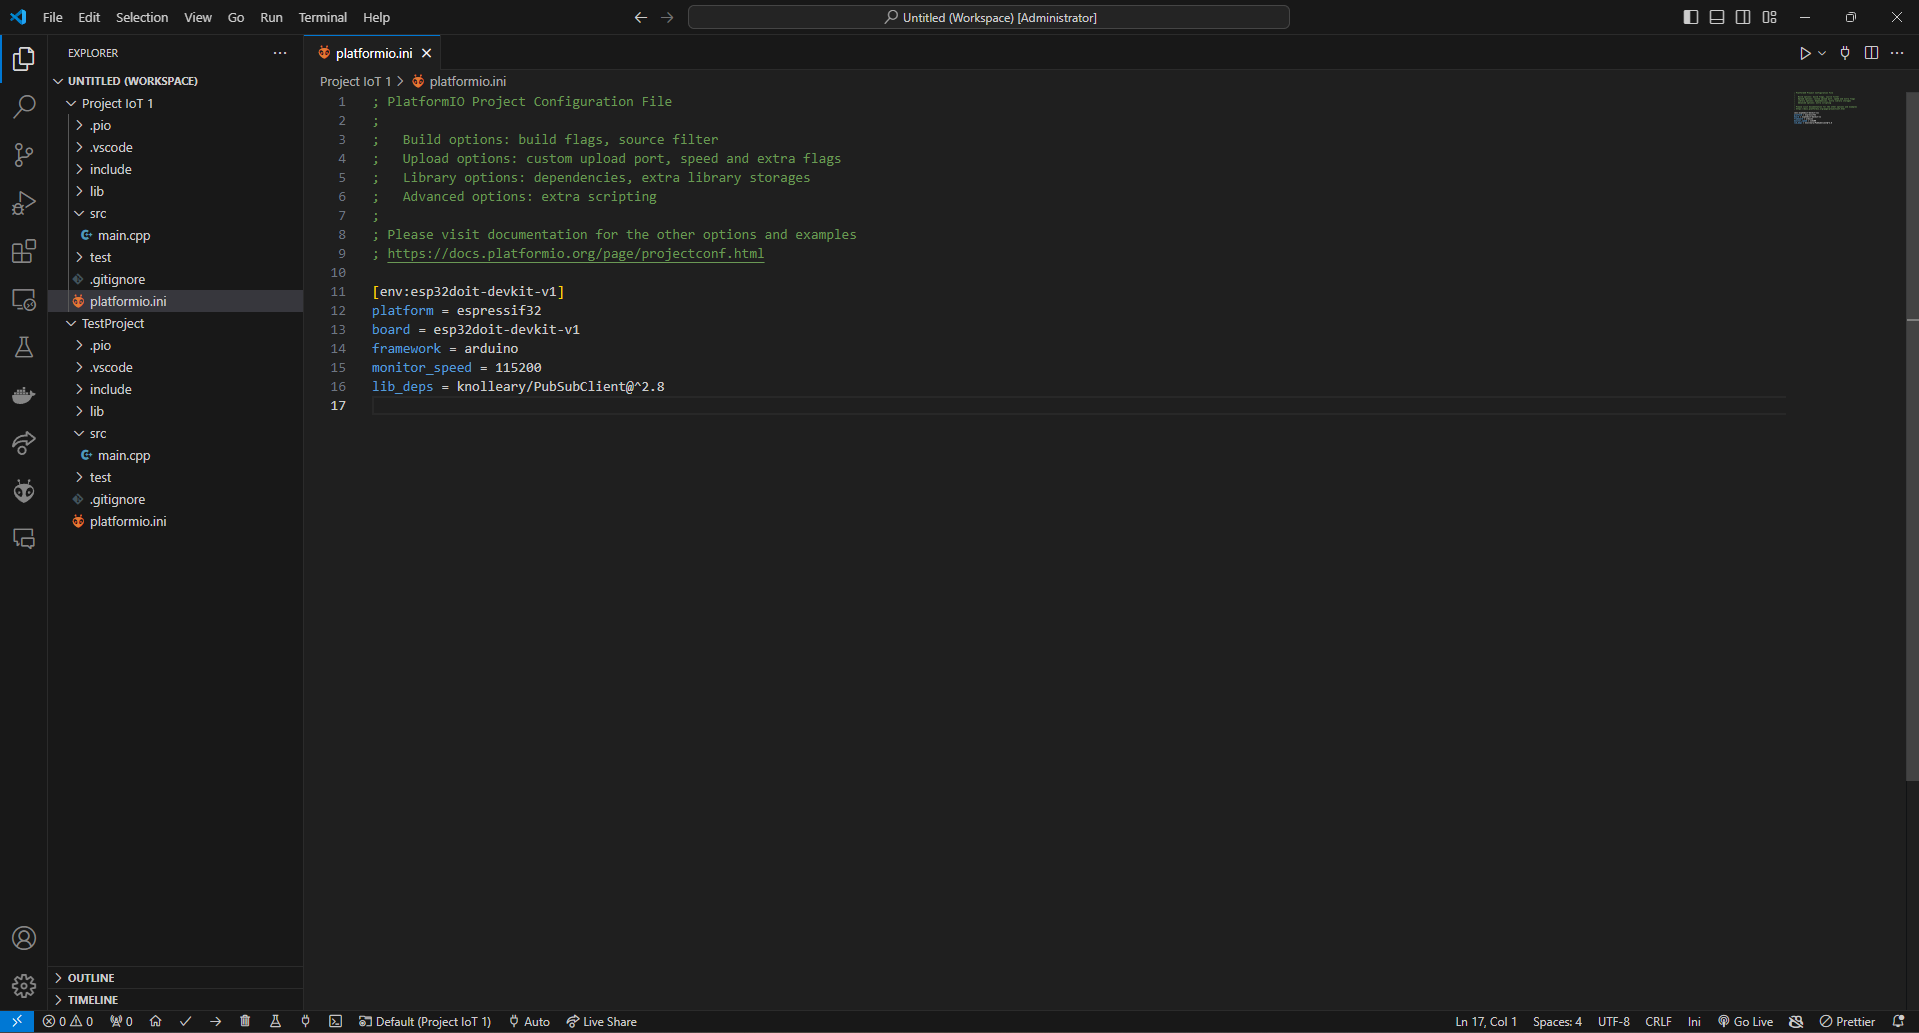
5. Check the .ini File
Check if the lib_deps line is added. Save the file (Ctrl + S) if your file doesn't autosave.
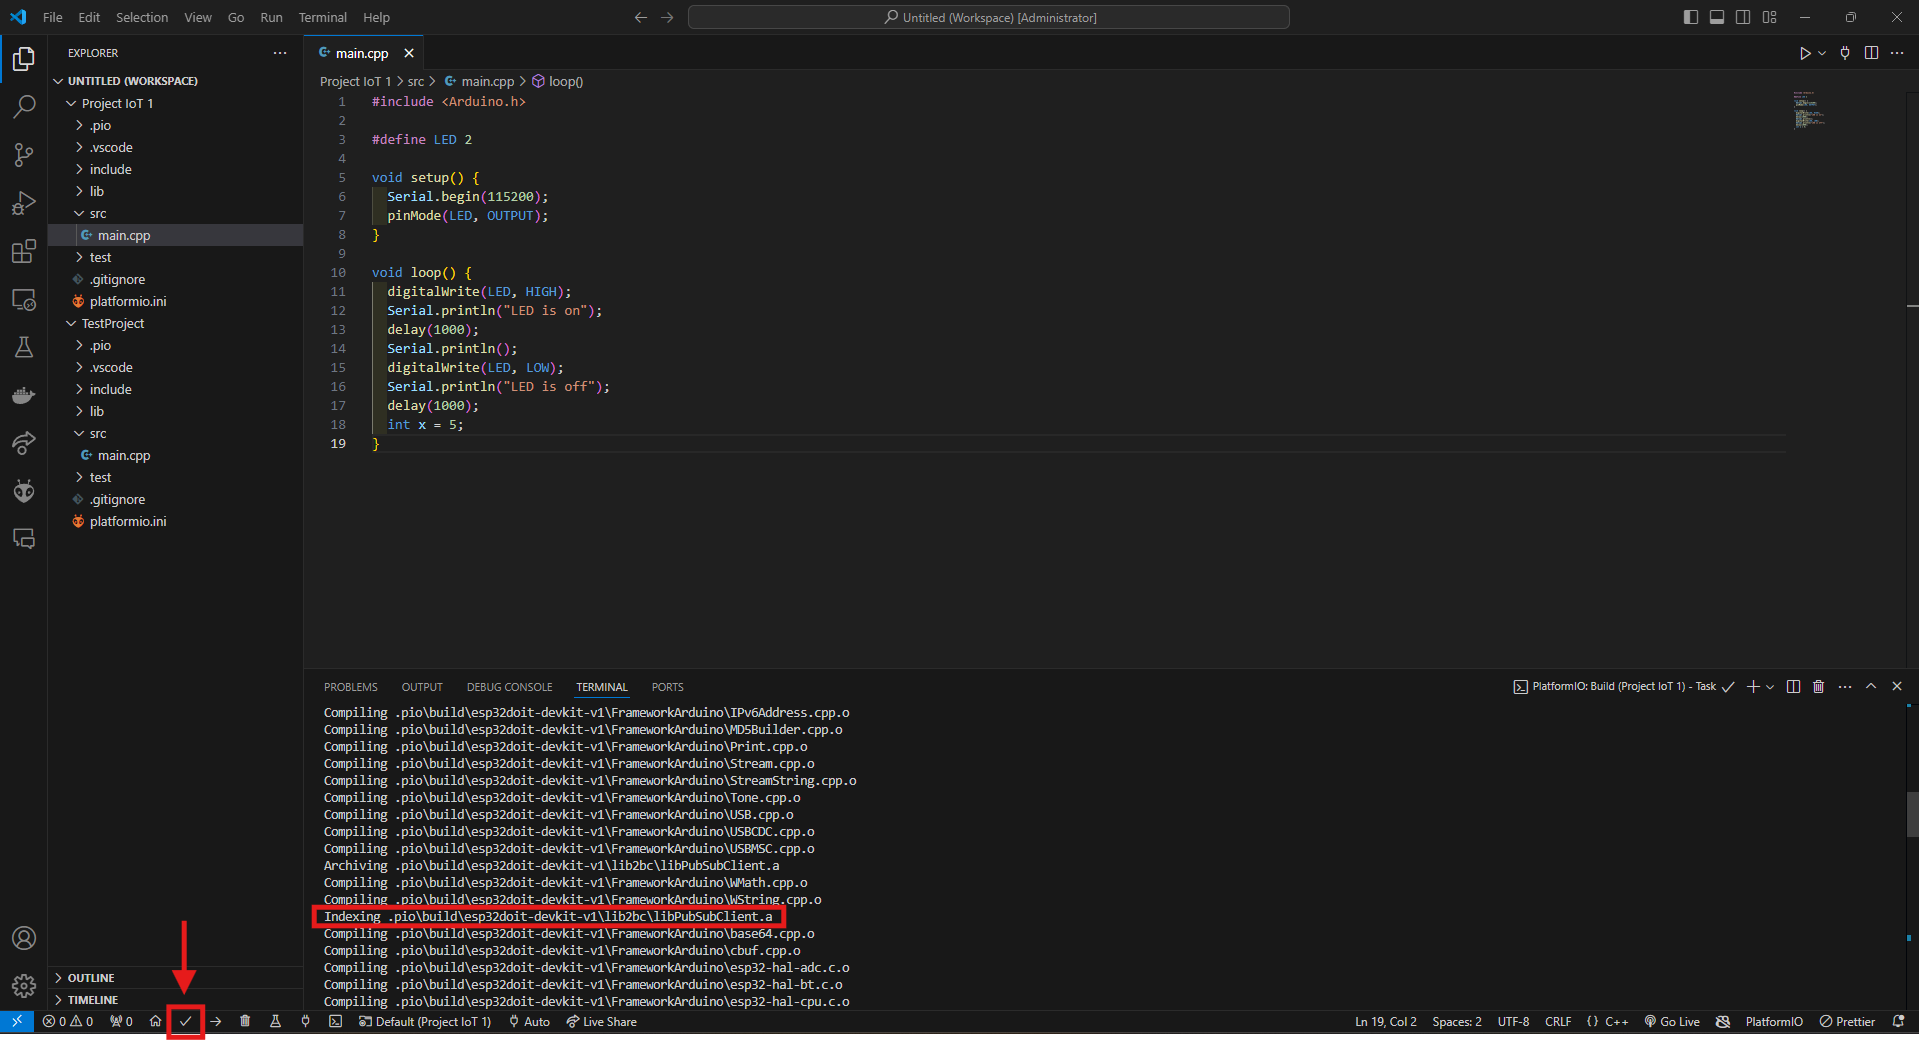
6. Press the Build Button
Build the project so you can have code auto-completion.
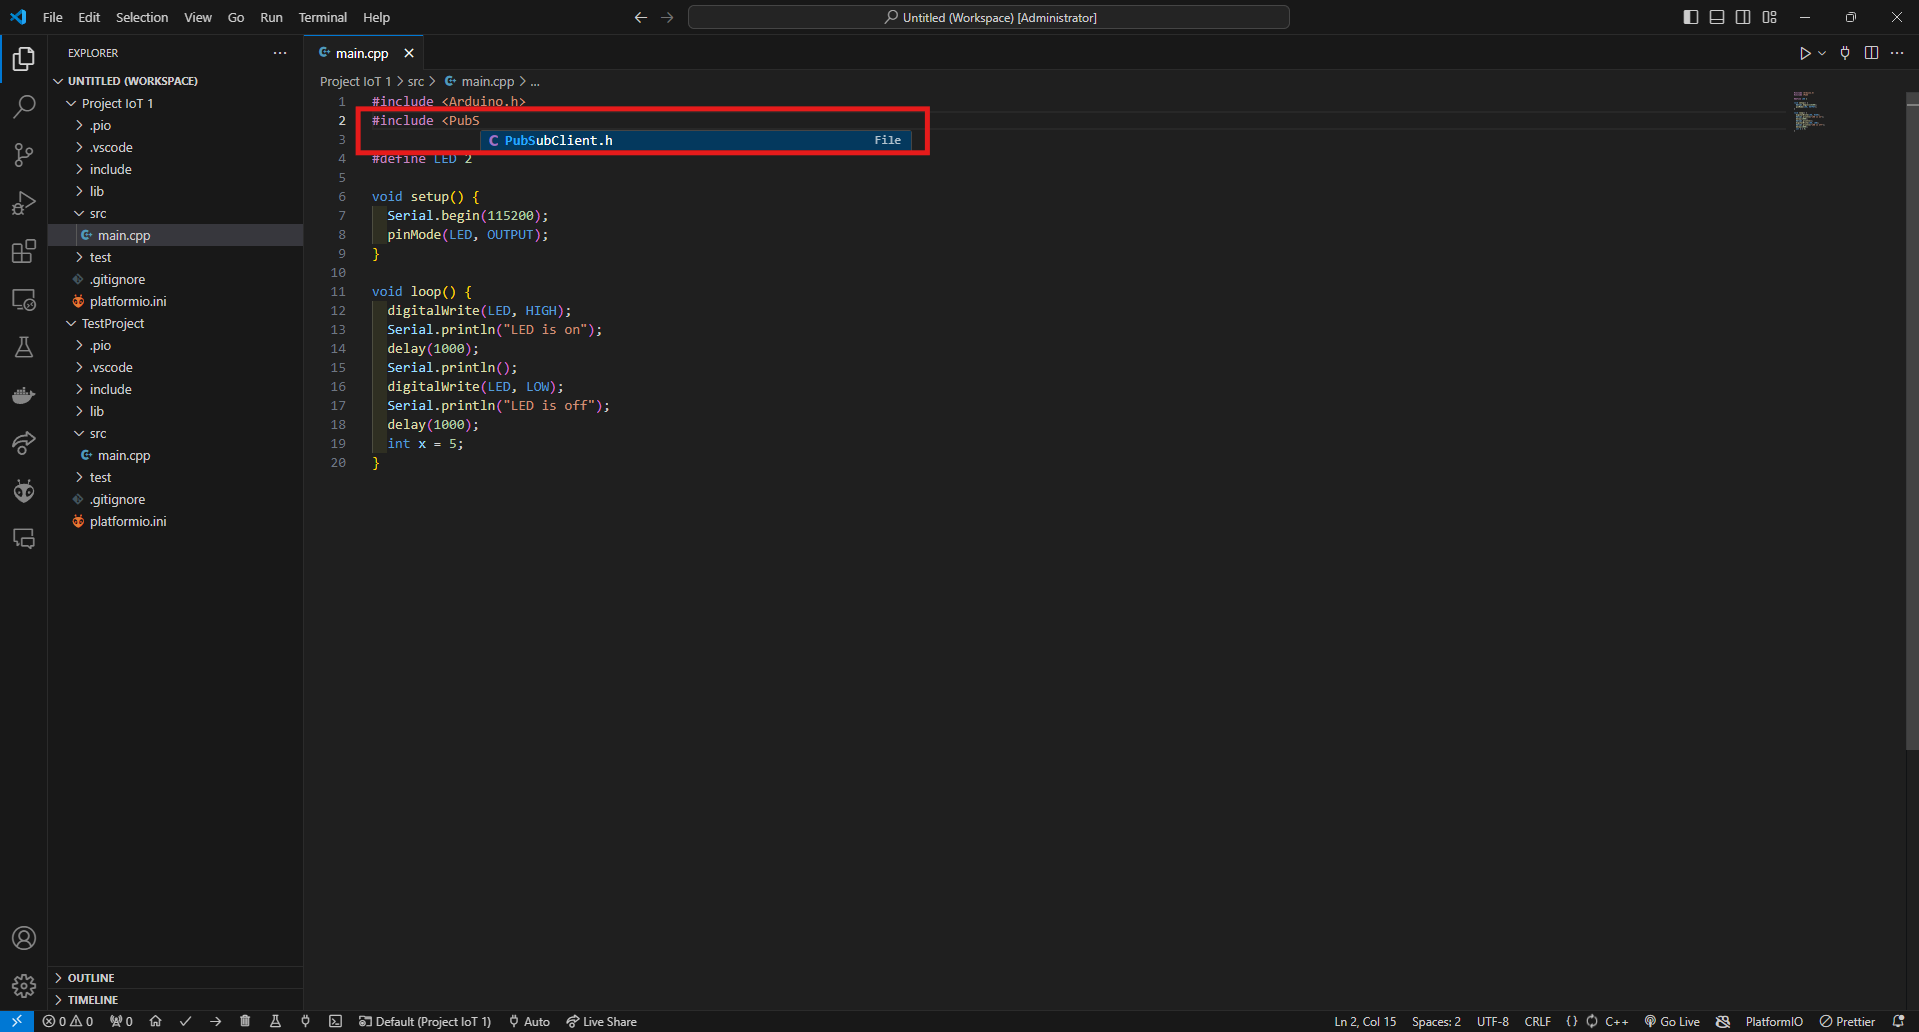
7. Include the Project
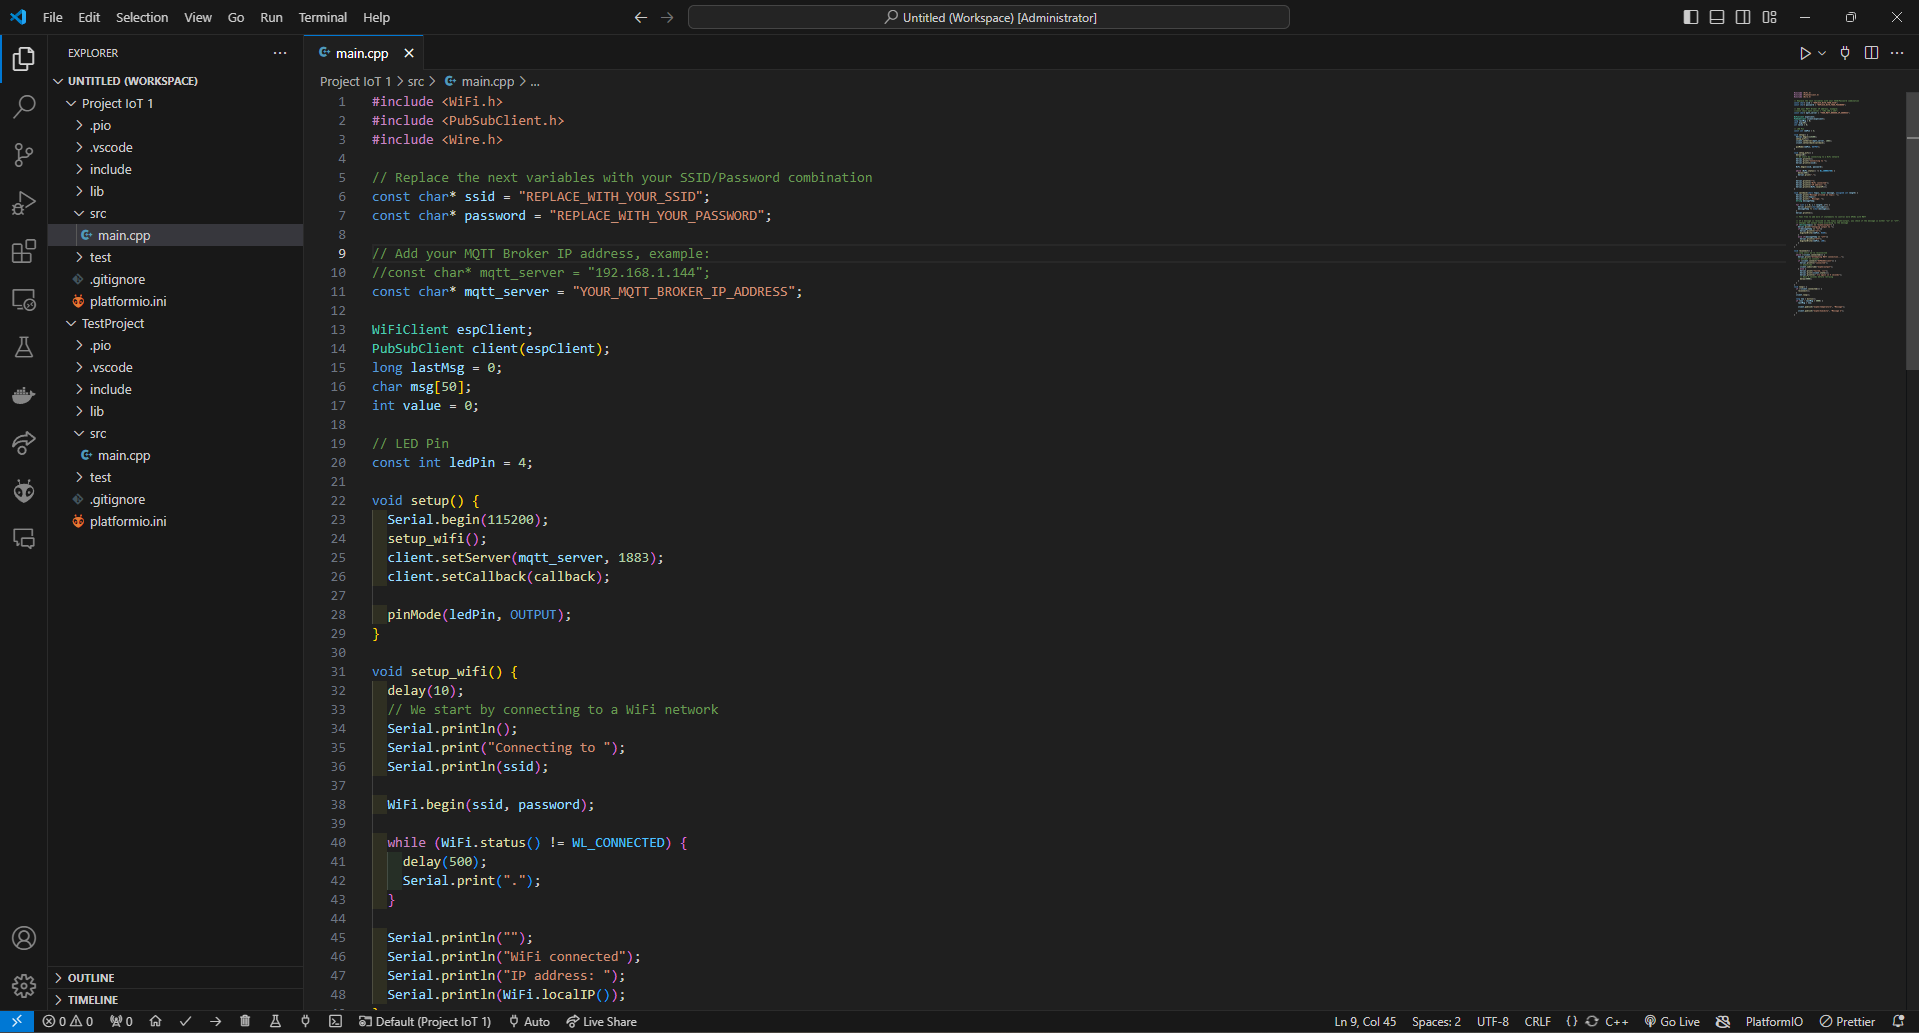
Include the header file and you code auto-completion should work. Then, you can freely use the libary.

